
Edit Legend Properties
The Legend Properties panel is shown:
-
When the Show Details >> button is selected on the Legends Manager main screen (a legend must be selected).
-
When a legend is selected from the Available Legends list on the Legends Manager main screen. This automatically displays the properties panel.
The Legend Properties panel contains all the details that define a legend interval. It is located on the right of the Available Legends and Selected Legend Contents lists in the Legends Manager, for example:

Properties panel contents update automatically when a new legend is selected.
Note: If a legend item is selected in theLegends Manager, and Editis selected, a popup dialog is displayed. This allows you to view and amend a restricted range of details for a single legend item.
The fields shown are dependent on the item selected in the Available Legends List in the Legends Manager. If a legend description is selected, rather than an individual legend interval, you will only see the Name and Interval Type fields. However, if an individual legend item is selected, you will see all the fields listed below.
Important: Once you've customized your legend interval, clicking Apply commits these changes to the legend. Be sure to use it when you're ready!
To edit the properties of a legend interval:
Open the Legends Manager.
Choose a legend from the Available Legends list.
The Legend Properties panel displays (if not already) and shows the details of the first interval, if one is available. Otherwise, the legend's Name, Interval Type and Data Type (only) are displayed.
Select a legend interval to modify by picking it from the Selected Legend Contents list.
The Legend Properties panel updates to show the details of the selected interval.
Review the legend Name. This is the name of the legend selected, or the name of the legend associated with the selected interval. It can be edited.
Tip: Legend descriptions are available in several formatting areas of Datamine applications, so it is recommended that a sensible naming convention for legends is devised - for example, "Drillhole Validation Filter" or "General AU Grade Legend".
Review the Interval Type.
Each legend contains a series of intervals - the more intervals, the more possible display formats can be applied to your data. These intervals are defined either as a specific Value (e.g. precisely 3), a Range (e.g. from 450 to 600) or as a Filter Expression (e.g. greater than 5 but less than 10). For more guidance on interval types, see Legends Manager.
Selecting Value displays the Value drop-down list in the Legend Item Interval section below.
Selecting Range displays the Range and to lists in the Legend Item Interval section.
Selecting Filter Expression displays the Filter Expression drop-down list and the Expression Builder... button in the Legend Item Interval section.
Tip: Range and other legend types can be set up easily using the Create New Legend tool. You can define your ranges based on an attribute's values, and in relation to a frequency histogram reference chart. You can reposition bin boundaries interactively, set up new coloring, edit the number and range width of bins and lots more.
Choose the Data type that the interval contains. Each legend can be applied to a particular database column (for unique value and range legends, or multiple columns for filter legends). This data can be either numeric or alphanumeric - in other words, string data. When devising a legend, it is important to be aware of the type of data it will be associated with: for example, if you are going to create a legend to show all WASTE field values within a given block model, with all other areas containing ore above a specified cut-off grade, you can do this in different ways. Three examples follow:
If each cell within the block model database has a column for WASTE to signify if it is to be treated as such by a 'Y' alphanumeric description, with all other cells carrying an 'N' value, you could create a legend that displays one colour if 'Y' is found to be associated with the WASTE field value and a different colour if 'N' is associated.
Alternatively, with a model containing mineral ore grades both above and below an acceptable cut-off point, an expression could be devised to show all ore grades using a ranged legend (created using the Create New Legend wizard). This range could be defined as percentile grades or by linear distribution, for example.
A legend could be devised using a combination of the above methods, with all ore grades above a cut-off point being represented by a colour range (depending on legend intervals), with an additional legend item being introduced to cope with the values below the cut-off.
It is important, when defining the Data type, that you will only be able to use the specified legend item to represent a particular data column within an object if that type of data exists. alphanumeric data types are used to compare alphanumeric values, and numeric values can be used to specify legend properties for numeric data.
If an attempt is made to edit a Data type for a legend that is already associated with data of a given type, this operation will be blocked, and a message telling you that this type of action is not possible.
Choose how your legend intervals are labelled using Automatically generate description:
if selected, the name of the legend item (as represented in the Selected Legends Contents list is created depending on the Interval Type.
If a Value, the value will become the Description of the legend item.
If a Filter Expression, the value will become the Description. Finally, if a Range is selected, the range values will be used to make up the Description instead.
To choose what the selected legend interval represents, using Legend Item Interval:
If the Interval Type is Value, a single value (numeric or alphanumeric) is specified here, and can be edited. This is the only value the interval represents, and is typically used to format or categorize data that has meaningful unique values.
If the Interval Type is Range, two editable fields display to let you specify the lower and upper bounding values for a range. These values can be set automatically (initially) when the legend is created, to create intervals or a similar size or value density, or you can choose your own range.
Note: Overlapping ranges aren't a good idea. If one interval range 'ends' after another 'begins', the latter interval will take precedence. For example, for the ranges 1-3 and 2-4, the actual interval sizes are 1.9999 (1-1.9999) and 2 (2-4) respectively.
If a Filter interval is being defined, the Expression Builder... button displays the Expression Builder screen, from which a suitable filter expression can be defined. A filter expression can represent the contents of one or more attributes, or static values, or any combination thereof.
To choose how the legend interval is displayed in a 3D view, edit the contents of the Legend Item Format group. You cannot edit SYSTEM legend interval formats, only USER or PROJECT legend intervals:
Opacity: set the transparency of the legend item. You can enter a value between 1 and 100 into this field.
Fill Style: if you are using 3d Rendering, and have the Filled option selected (set using the Format Display dialog), you can elect to display your data that corresponds to the current legend item conditions using a variety of methods. Legend fill styles will be shown in both Design and Plots windows views:
None - prevent data that is relevant to the current legend item values from being drawn to the screen.
Solid color - data with filled areas are shown in a solid and continuous color.
Texture - A textured fill is possible for filled areas. Textures are represented in the currently selected Fill Color (see below). Selecting this option requires you choose a Texture File Name.
Colored Texture - Textured fills can be applied using multicolor textures. Selecting this option requires you to make a selection from the Texture File Name list.
Color - Select a base color for your texture fill. This color will be used for the Solid color and Texture fill styles.
Texture File Name - If you are applying a textured fill, use the drop-down list to select an image to be tiled during texturing.
Line Style/Width/Color - Use these options to specify how lines are to be drawn for the current legend item.
Symbol Style/Size - Specify the style and size of any symbols to be associated with the current legend item.
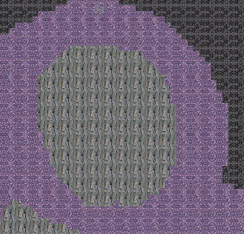
Note: A preview of your current legend item settings is shown on the right of the Legend Item Format panel, for example:

Immediately below this icon the option Use fill for line color is displayed. If selected, the current fill base color is used to surround the legend item. This selection will disable the Line Color field on the left as it is no longer relevant. If deselected, a Line Color can be set independently.
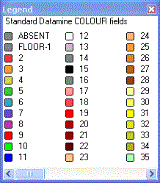
Select Preview Legendto display a small key dialog showing all values in the current legend, and a thumbnail image of how each value (or range of values) is to be represented, for example:
Finally, click Apply to update the selected legend with new interval properties. You may need to redraw 3D data to show the new formatting.
Related topics and activities