|
|
An explanation of fields and properties |
Data Export Dialog
To access this dialog:
-
Right-click an object in the Loaded Data control bar and select Data | Export.
The Data Export dialog is used to convert currently-loaded data into external files of a specific type. Files are written according to the specified category of data they belong to, and the type of data within that category. This combination of properties determines which routines are used to create the resulting files. These routines are known as 'data source drivers', and each driver is responsible for creating file(s) of a specific type.
Field Details:
Driver Category: selecting a category of data driver in this list will populate the Data Type list (see below).
|
Data Category |
Dialog Displayed |
|
CAD |
Save As dialog, then Write Drawing File. |
|
Datamine |
Datamine Export Options. |
|
DirectX |
Save File dialog. |
|
ESRI |
Write Source File dialog, then Read ESRI Data. |
|
Google Earth KML |
Write Source File dialog, then one of the following dialogs: Export Google Earth KML - Strings DialogExport Google Earth KML - Points Dialog |
|
Micromine |
Save File dialog. |
|
ODBC v2 |
Select Data Source dialog, then a source-specific dialog. For more information on Data Source Drivers and adding an ODBC data source, see the Related Topics links below. |
|
STL |
Save File dialog. |
|
Surpac |
Save As dialog. |
|
Text |
Save As dialog, then the Text Wizard. |
|
Vulcan |
Save As dialog, then Vulcan Model Export. |
Data Type: data types, specific to the selected Driver Category (see above) are shown in this list. You will need to select a category and type to export a file.
OK: when a Driver Category and Data Type have been selected, the data export process continues. The following stage in the export process will depend on the selections made:
Cancel: closes the Data Export dialog.
Help: launches this Help page.
Filtered Items Only: if selected, then only visible data are exported –hidden or filtered items are ignored.
|
|
If you are exporting individual files to Microsoft Excel using the ODBC driver and you simply wish to create a spreadsheet view of an object's data columns, you may wish to use the Loaded Data control bar:
|
Driver Help: shows information on the selected data driver type.
Using this Dialog
Exporting data may require additional information to be supplied, in order for the resulting file to be read successfully by the receiving application. In these situations (e.g. when exporting a Vulcan model file, an ESRI file etc.) additional driver-specific dialogs allows you to specify this information.
Tables that have been edited or created by the program, e.g. the intersections table, must be exported to save the contents of the table. A range of export drivers are available in addition to the Text table driver described here. For more information about Data Source Drivers see Using Data Source Drivers.
To export a table
-
Activate theDataribbon and selectExport | External
-
Select a table from the Objects to Export list.
-
To just export visible data, select the Filtered Items Only option.
-
Click OK.
-
Select a category and driver, and click OK. The dialog displayed next depends on your selections.
Example
If the [Text] Driver Category is selected, and the [Block Model] data type, the operation of the table driver is described below:
-
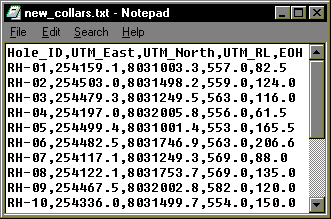
The Save As dialog is displayed so that you can select a directory in the Save In box and enter a file name in the File Name box. When exporting to text files, use the file name extensions *.txt or *.csv, for example "new_collars.csv".
The first of 4 dialogs of the Text Wizard is displayed. -
To create a "comma separated value" or csv format file, select the [Delimited] data type, check the option to Insert a Header Row, and choose Next.
-
Select a field you wish to export from the Available box and choose the --> button to add to the Actual box. Repeat for all fields you wish to include in the exported file. Choose the <-- button to remove a selected field from the Actual box.
-
Choose the up or down buttons to change the order of fields in the exported file, and choose Next.
-
Inspect the previewed export file, and choose Finish to start exporting the table, or Back to change your selections, e.g.:

|
|
Related Topics |
|
|
Data
Load Wizard Data archiving Data Model Data Types Loaded Data Control Bar |


