|
|
3D Map Data Folder Menu Using the Maps folder menu |

3D | Map Data folder menus
To access this menu:
-
In the Sheets control bar, active 3D folder, expand the Map Data sub-folder.
The 3D | Map Data folder is used to manage georeferenced map data.
This folder is dynamically populated and will display loaded, georeferenced data only (even if the loaded data is hidden).
Each georeferenced map will be represented by its own map folder. Each map folder is described with the map name and will be suffixed with a number in square brackets indicating the number of loaded data objects directly below that folder.
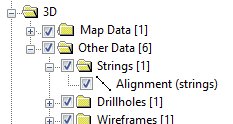
This section of the Project Data bar can include up to 4 levels:
3D
Map Data Item
Right-clicking the 3D folder's "Maps" sub-folder reveals the following context-menu options:
- Add Map...: add a new non-georeferenced map to the current database and display its map window, using the New Map dialog.
- Pick Map...: interactively select a map in the 3D world view to make it the current map.
Expanding the Maps folder reveals map folders for data that has already been loaded into the 3D world window. Folders will not appear for maps that do not have loaded and georeferenced data.
Right-clicking a named map folder reveals the following context-menu options:
- Save: if changes have been made to the selected map, you can save them (and commit changes to the database) using this option.
- Make Current: select this to make the selected map the current map. Not available if the map is already current (and shown in bold text).
- View: show a map window of the currently selected georeferenced map. If one is not already available, it will be created. More about world and map windows...
- Delete: delete the current georeferenced map, after confirmation.
Each georeferenced map folder can contain a sub-folder representing a map data type (Features, Comments, Profiles, Sketches etc.).
Not all may be visible; this depends on the contents of the selected map.
Generally, these data-type-folder level context menus will include Properties... option. This will open the relevant Mapping task bar panel. In addition, other data creation options might be able, such as Add Comment, Add Channel Sample etc., depending on the folder type that is selected.
The context menus found here are the same as those found for the corresponding folder in the Map Database menu branch.
The following map data items can be found at the lowest level of the 3D folder tree:
- A georeferencing object. This represents the planes used to construct your map. Double-click/tap this object to access and edit its visual display PlanesProperties.
- An Areas folder: contains an Areas object. This stores string and outline data representing one or more areas associated with channel sample centers. Double click/tap this object to access StringProperties.
-
A ChannelSamples folder: contains a ChannelSamples object. This stores the channel sample overlay information for the selected map. Double-click/tap this object to access the Drillhole Properties dialog.
-
A Comments folder: contains a comments points object. Double-click to access PointsProperties.
-
A Features folder: contains strings representing map features. Can contain one or more feature objects, named according to the selection made on the Features panel prior to digitizing. Double-click/tap any feature object to access StringProperties.
-
A Pictures folder: contains the pictures object for the map. This object is a planes object containing all image data for the selected map. Double-click/tap to access PlanesProperties.
-
A Profiles folder: contains the profiles object for the map. All profile strings are stored here. Double-click/tap the profile object to access StringProperties.
-
A Sketches folder: contains sketch data for the map. Double-click/tap the profile object to access StringProperties.
3D map data items are also supported by a right-click Look At option. Selecting this will point the 3D World camera at the selected item, automatically adjusting the view direction and magnification.
Data Visibility
Items in this section of the Project Data bar can be hidden and shown using their corresponding check box. These check boxes can also be used to globally hide or show 'branches' of the tree menu.
At the lowest level, data items will either be displayed or hidden, as indicated by a black tick or empty box.
Folders containing items can be one of three states:
-
 : all items in
the folder are currently displayed
: all items in
the folder are currently displayed -
 : all items in
the folder are currently hidden
: all items in
the folder are currently hidden -
 : a grey tick
indicates a mixture of displayed and hidden items is contained within
this folder
: a grey tick
indicates a mixture of displayed and hidden items is contained within
this folder
For example, to hide all currently displayed feature data from a map, you can clear the check box next to the Features folder icon for that map.
|
|
Related Topics |
|
|
Creating a MapThe Current Map |