|
|
Orientation Dialog (1 pt) Defining section orientation by 1 point |
Section Orientation by 1 Point
To access this dialog:
-
In the Sheets control bar, 3D folder, right-click the Sections sub-folder, select New, click in the 3D window to define a section centre point.
-
In the Sheets control bar, 3D folder, Sections sub-folder, right-click a section object, select Set Plane | By 1 Point.
-
Activate the View ribbon and select 1Point.
The Orientation dialog is used to define the orientation of the section when it is being defined by a single point.
|
|
This dialog is displayed when either a new section is created, the current section orientation is modified or the view plane orientation is modified. |
Field details:
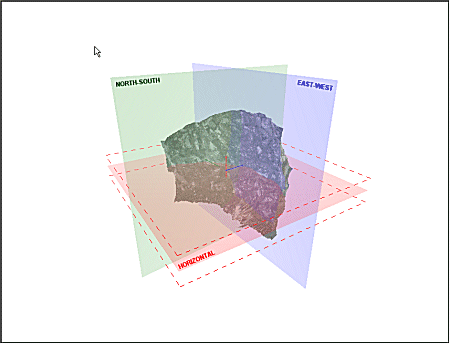
Orientation: Three orientation options:
-
Horizontal: create a horizontal section (oriented orthogonally to the Z axis) passing through the selected point.
-
North-South: create a section running in the north-south direction.
-
East-West: create a section running in the east-west direction.

In all cases, the defined section will be added to the end of the list of section objects in the Sections folder.
It is often useful to include planar section views in a 3D display. For example, you may wish to provide a flat zone upon which to digitize, or you may wish to define a fault plane according to, say, the display of Sirovision textured mesh.
A Section Definition is the term given to a series of parameters that precisely define a 2D plane in space. This facility exists within the 3D window to allow reference planes to be displayed, providing a basis for indicating particular aspects of your virtual scene, or to be used as a 'canvas' upon which to digitize strings for the purpose of texture alignment, mobile object simulations.
| |
Related Topics |
|
|
Using the Sections folder |

