
Cell Format
To access this screen:
-
On the Log View Properties screen, Header, Column Titles or Footer tab, click Format.
-
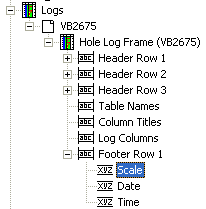
In the Sheets or Project Data control bars, Logs folder, Hole Log Frame, right-click a cell item, select Properties. For example:
Use the Cell Format screen to format the cell contents of a log sheet or plot item's header, footer or column title cells.
To format cell contents:
-
Choose whether to include a border around the selected cell.
-
Choose the font settings for the cell contents.
-
Select Use default font to display the information using the system default font.
-
Clear Use default font to enable Modify..., then click Modify... to choose another font type, size, or format.
-
-
Set the horizontal alignment for the cell text.
-
Choose Left to left-align the contents of the selected cell.
-
Choose Right to right-align the contents of the selected cell.
-
Choose Centre to centre-align the contents of the selected cell.
-
Choose Wrap to wrap cell contents onto the next line.
-
-
Set the vertical alignment for the cell text.
-
Choose Top to align text to the top of the cell.
-
Choose Middle to align the cell contents to the vertical centre.
-
Choose Bottom to align the cell contents to the bottom of the cell.
-
-
Choose whether to use an opaque cell background. Select Opaque to display an opaque background colour; leave it cleared to use a transparent background.
Related topics and activities: