|
|
Studio OP Tutorial - Setup Creating a project for your tutorial |

OP Design Tutorial - Getting Started
A brief exercise to set up a new project for your OP Design tutorial.
Generally, the functions described here represent generic/core Studio product functionality.
Prerequisites
-
Your Studio OP installation has access to a valid license.
Exercise: Project Setup (Pit Design Tutorial)
- Launch Studio
OP and, at the Start
page, select New Project...:

- Progress the New
Project wizard with the following data:
Name: "PitDesign_Tutorial" (if a project with this name already exists, pick a different name - an empty project is required for this tutorial)
Location: C:\Database\PitDesign tutorial (or whatever the project name is)
Automatically add files...: disable (uncheck)
Otherwise, click Next and Finish to complete the wizard. The 3D window will be displayed.
Exercise: Setting up Initial Pit and Topography
First, define some basic reserves workflow parameters for your project. This includes defining a pit name, topography file and planning model.
- Select the Setup ribbon.
- Select Pits | Manage
- Overwrite the existing "Pit1" description with "Design Tutorial Pit"
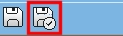
- Click the Save
and Close button:
- Next, assign a topography to your pit: click Pits | Surface Topo (this is only enabled once a pit has been defined).
- To add a new topography file, click Add
and browse to C:\Database\DMTutorials\Data\VBOP\Datamine.
Select the file _vb_stopotr.dm
and click Open, then OK to list it on the Manage
Topography panel.
")
The "_vb.." prefix of some Datamine tutorial data represents a legacy project used to support software versions of the past. It refers to the "Viking Bounty" data set, a fictitious open pit operation.
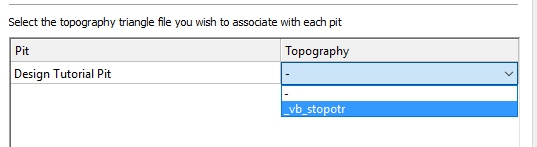
Selecting the above file will automatically copy it from the target location to the current project folder (within the OPDatabase subfolder).
- In the lower table, use the Topography
drop-down list to select [_vb_stopotr]:
- Click the Save and Close icon.