
|
|
Example - Scheduling Data Settings Defining the files for your scheduling project |

Scheduling Data Settings
The Data Settings dialog is used to load and save project settings, define the various scheduling data objects, set how fields are treated, and define bench settings.
In this exercise you will select the data set created in the "Reserves Calculation" section of this example.
Prerequisites
-
You have completed Creating a Scheduling Data Set or;
-
You have downloaded the Example tutorial data (Internet connection required) and unzipped it to a folder C:\Database\Studio_OP_Example
The following URL will let you download the demonstration data:
https://dataminesoftware-my.sharepoint.com/:u:/p/productstore/EaEhgHQLhh9DgSqLsqLVH-YBTgk5mFVjkpdo_R77Q0Z1zw?e=ijsoRg
(Paste the address above into a browser to access the archive and download it. No login is required)
This data is suitable for Studio OP version 2.7 or later.
Exercise: Selecting a Reserves Data Set
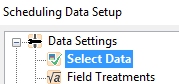
- Activate the Schedule ribbon and select Data Settings.
- In the Scheduling
Data Setup dialog, expand the Data
Settings menu on the left and click Select
Data:
- Using the Select
Data panel, expand the Scheduling
Data Set drop-down list and select [Studio Example Reserves
Data].
Once selected, the remaining fields on this panel are hidden. The settings are no longer needed as all the information required for this stage is in the incoming reserves data set. - Create a new Mining Schedule table (even if one already exists). This will be populated/updated throughout the remaining exercises. Click New.
- In the New Schedule Table dialog, enter the name "Example Mining Schedule" and click OK.
- In the Select Data panel, click Apply. At this point, your project will be updated to include the placeholder objects that will be required in the remaining tutorial exercises.
Exercise: Defining how Data Fields will be Treated
Field Treatmentsare used to define the way in which fields (data columns) are treated in calculations during scheduling. Fields are gathered from the reserves file.
- In the Scheduling Data Setup dialog, select the Field Treatments icon.
- The Field
Treatments panel is displayed. A list of fields is shown
on the left. These fields correspond to attributes in your reserves
table. This panel is used to determine if a field is weighted
(and by what) plus other options.
Select the [MFO_SEQ] field in the left-hand list, then select the Copied radio button on the right. This will ensure the attribute is copied 'as is' to the schedule table when it is created. - Review the following additional fields and
confirm they are already set to Copied:
[MFO_YEAR]
[NPVMCOST]
[NPVPCOST]
[NPVPROFT]
[NPVREVEN]
Note that all alphanumeric fields are set automatically to be copied.
In the following exercise, you will set up your scheduling calendar. You will return to the Data Settings tools after you have created a calendar in order to ensure AU is included as a product for the Auto Scheduler, up to a given time period.
Additionally when picking a new data set if it includes additional fields you may need to return to Field Treatments to ensure they are correctly defined.