
|
|
Example - Evaluating Blocks to Produce Reserves Evaluating your mid-term blocks and generating a reserves table |

Evaluating reserves
In this exercise you will evaluate the previously-generated mining blocks (a combination of automatically and manually-generated volumes) against a custom evaluation legend, which will be loaded from an external legend file.
The resulting reserves table will contain the tonnes and grades, plus other attribute values, of the mining blocks and are used when scheduling. All evaluations are performed against the model defined during the Project Setup phase (Define Planning Model).
Prerequisites
-
You have completed Manual Block Review
Exercise: Review evaluation settings
You have already specified a reserves category as part of the project setup; the specified model for this example (simmodpl) has been defined, and you set the NPVDEST attribute as a [Category] attribute. This category denotes the destinations in NPV against which an evaluation will be performed.
- Using the Reserves ribbon, select Mining Blocks | Evaluate.
- Studio OP automatically populates this panel
wherever possible; in this case, the Model,
Legend and Column
have been filled in. As you're going to use a custom legend file
for your evaluation, you need to make an adjustment before you
start.
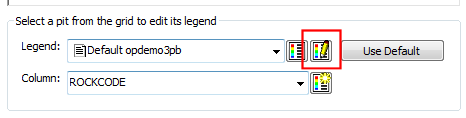
Select any cell in the first row of the table to enable the legend commands below. - To access your custom legend file, you need
to edit the default legend that has been specified. Click the
Edit Legend button as
shown below:
- This displays the Legends
Manager. Click the Load
Legend... button and Navigate to your DMTutorials data
folder found here:
C:\Database\DMTutorials\Data\VBOP\Datamine
Select the file "Evaluation Legend.elg" - Click Close in the Legends Manager and expand the Legend drop-down list - locate and select the [Evaluation Legend] item.
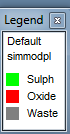
- Before you evaluate your blocks, preview your
legend; evaluation will be performed against each of the categories
shown:
- Click Evaluate
Blocks. Once completed, you will see a notification message
and summary report:
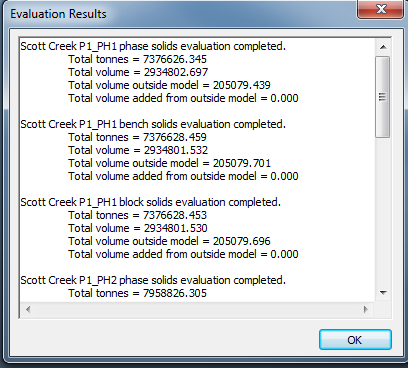
Click OK. - You can see that there is material outside
each of the phase boundaries. Depending on the significance of
this volume, you could elect to create a fourth reserves category
that will represent this material with the default DENSITY for
the model (this was set to "1.6" in the Define
Model task).
For this example, you're just going to ignore it and base reserves solely on the material within the phase boundaries. - A Reserves table has been generated. You can access it using the PitData control bar.
- Click the Reserves
button, as shown below, to launch the Reserves table for all phases
and benches in the Table Editor:
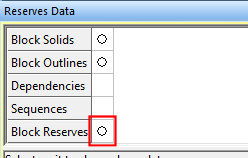
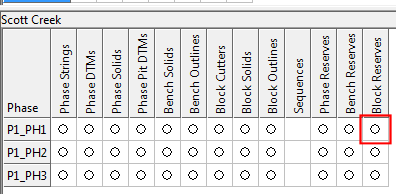
- You can also show the reserves for each phase,
bench-phase or overall block reserves; for example, select the
BlockReserves
item corresponding to P1_PH1 to show reserves per block for Phase
1:
This will display a reserves table, categorized by ROCKCODE, that relates to blocks to be mined within phase 1. - Close all displayed Table Editors.
- Save and Close your task.
The next exercise shows you how spatial dependencies are generated in Studio OP.