
|
|
Example - Manual Block Generation Adjusting your automatically-generated output |

Manual Block Creation and Adjustments
This exercise describes the manual creation of mining block outlines and solid wireframes by cutting the bench solids with manually-defined cutter strings.
Cutter strings can be defined within the task or
imported from an external file. Any strings generated as part of the
automatic block generation task can also be reviewed with this panel.
Prerequisites
-
You have completed Automatically Create Blocks
Exercise: Reviewing the generated blocks
In this example, you are going to review the automatically-generated blocks from the previous exercise.
- Using the Reserves ribbon, select Mining Blocks | Manual. This displays the Manually Create Mining Blocks task. If you are asked to save the previously open task, click Yes.
- Make sure that no bench data clipping is active
by checking the Bench Clipping
toolbar and disabling the Clip
Using Benches option if it is selected (it is selected
in the image below):

- By default, the outline strings representing
phase 1 are enabled. You should see something similar to the following
(enable a plan view if required):
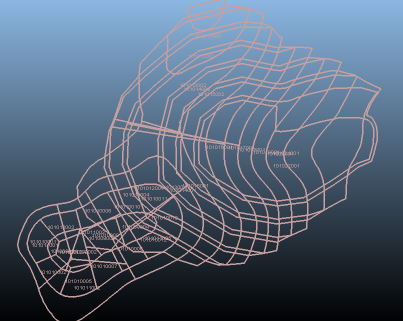
Each of the outline strings are labelled with their corresponding BLOCKID value. - The Mining
Blocks table shows, for each defined bench, whether the
phase has been cut to achieve the mining rate and density target
set for it as part of the Automatically
Create Mining Blocks task.
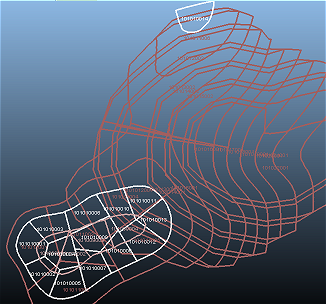
Select (left-click) any cell in the first row of the Mining Blocks table. - This highlights the strings representing the
generated blocks for the upper bench (2180 elevation):

- Select the [2170] elevation bench - the screen
updates automatically to show the outline strings for blocks to
be mined from this bench:
Note how the blocks are not contiguous at this level. - Review bench 2160:

Exercise: Using a custom cutter string to manually create blocks
In this exercise, you will modify automatically-generated blocks for the 2160m bench, using a manually digitized cutter string, in order to create more practical mining shapes for that bench.
- Select elevation [2160] in the table.
- In this case, you're going to subdivide blocks
101011002 and 101011003 by inserting a new cutter string. The
blocks, whilst they match the parameters specified during auto
block creation, would benefit from being sliced down into more
practical, smaller shapes.
Click New String and, in the Task window, digitize a string to split these blocks as shown (click Done after digitizing the final point):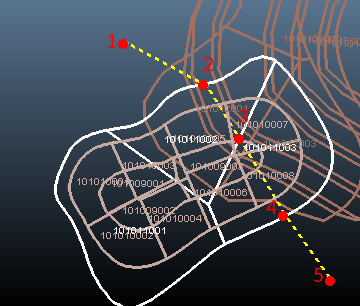
- To apply this new cutter string to the selected
bench, click Generate.
This subdivides any block within the selected bench using all defined cutter strings. In this case, two of the blocks are split into four: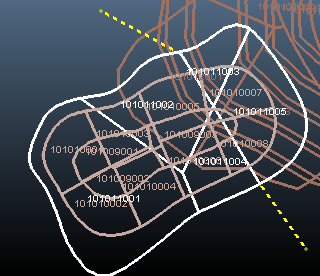
New block ID numbers are assigned automatically. - The upper benches, for mining in the relatively
near future, are subdivided more than those further down the list.
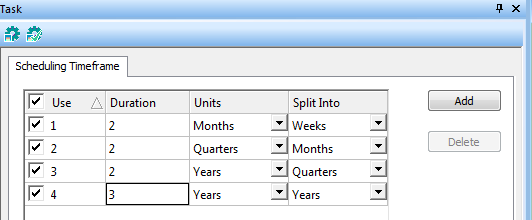
This is expected as the specified Timeframe
describes blocks representing a shorter time period than later
in the schedule (if you recall the timeframe values, the first
2 months of mining were split into blocks, each of which represents
a week's mined volume. As the timeframe progresses, the time periods
become less granular, i.e.:
You can see this by selecting bench level 2150 which shows blocks cut to represent a more strategic time period (in this case, years):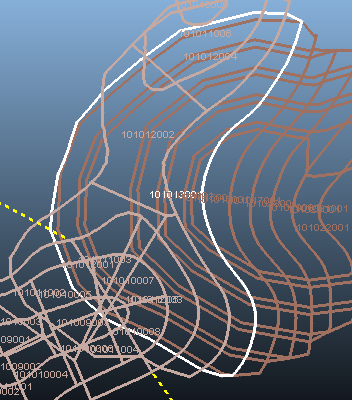
- Benches 2140 to 2050 are not subdivided by
the automatic block process at all. This is because the benches
can be mined in a year or less, so each bench is represented in
full as a single block.
Click through benches 2140 to 2050 to see this in effect. - Select Bench 2110 and digitize a new cutter
string to subdivide it (roughly equally) as shown:
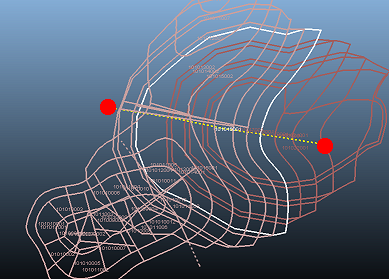
- Make sure that both strings extend beyond the boundary of the 2140, 2130, 2120 and 2110 benches - if you're unsure, digitize outside the hull of all existing closed strings.
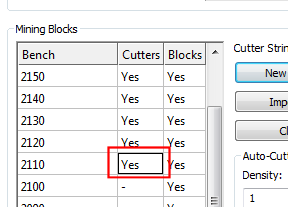
- Once digitized, you will see a "Yes"
description appear next to bench 2110 in the Mining
Blocks table - this indicates that a cutter string is available
for that bench (either manually or automatically generated):
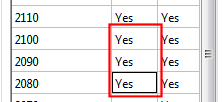
- For this example, you are going to use this
same string to split benches 2100, 2090 and 2080. To do this,
select row 2100 (any cell) and click Copy
from Above. Do the same for benches 2090 and 2080 - these
will now also show a "Yes" in their respective Cutters column:
- Click Generate All.
- To see the impact of these changes more clearly,
use the Bench Clipping
toolbar to activate the Clip
using benches option (you disabled this at the start of
this exercise):
Using the toolbar, set the Above option to "0" and the Below option to "1". This will show, for the target bench (crest) elevation, the full bench immediately below it:
- Click Bench 2110, 2100, 2090 and 2080 table
rows in succession. You will see a filtered view of each bench
(and an indication of the "1" below), similar to this:
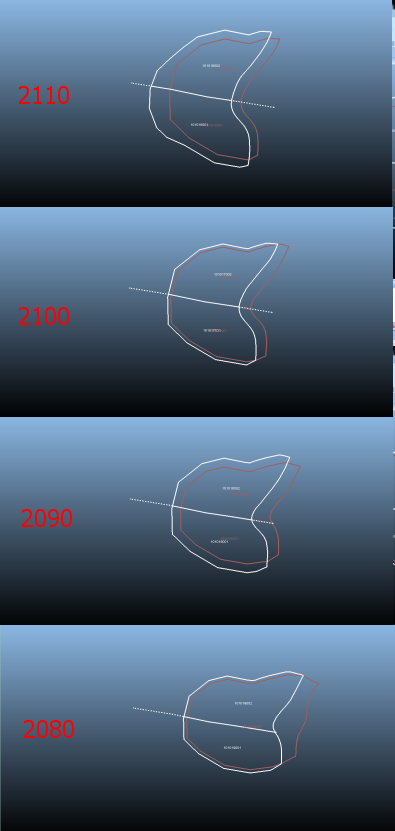
Note how identical copies of the 2110m cutter string has been used on the 3 following benches to subdivide blocks. - Save and Close your task.
In the next exercise, you will evaluate the generated blocks against the specified model and generate a reserves table.