
Create Mining Blocks - Manual
To access this screen:
-
Reserves ribbon >> Mining Blocks >> Manual.
This task creates mining block outlines and solid wireframes by cutting bench solids with manually defined cutter strings. You can define cutter strings in the task, or import them from an external file.
Mining blocks are the smallest unit of in situ material that you schedule. The size of the blocks you define on a phase bench generally relates to when you expect to mine them.
You can also use this task to subdivide imported mining blocks.
Note: This task honours strata information. If bench solids have been subdivided by strata volumes, these subdivided volumes persist throughout block generation so you can evaluate and schedule inter-strata and extra-strata volumes independently.
Tip: Use the Bench Clipping Toolbar to control how many benches you view above and below the current bench. This helps when you want to create cutter strings to use on subsequent benches.
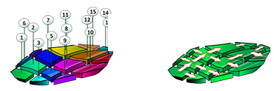
The 3D display automatically updates to show your current bench selection and any corresponding cutter strings. Any existing blocks display with a central label showing the BLOCKID value.
Block Creation and Sequencing Attributes
Creating mining blocks generates data tables representing a blocks object for each phase, plus a full pit-wide combined object containing all blocks.
The combined object contains MODELSEQ and SEQUENCE attributes, both normalised. It also contains a RAWMODSQ attribute with the same values as if you evaluated the blocks against the model using the sequence field (volume weighted), with the pit filter applied.
The MODELSEQ and SEQUENCE attributes are copied from the combined block outlines and put into the combined reserves file. This happens in the Evaluation task and the Sequence task.
Values on the individual phase blocks objects differ from the combined blocks object because phase blocks are not normalised.
Activity steps:
-
Display the Create Mining Blocks - Manual task.
-
Select the Pit and Phase you want to use.
-
Select a bench in the Mining Blocks panel to edit cutter strings for that bench.
-
Display the assigned block Model as a visual reference if required. By default, the model is coloured on its first grade field. Change the format using Studio formatting options, or use the Sheets control bar:
-
Choose what you want to display using the table on the right. This shows, for each Phase of the pit:
-
Solids – Check to display existing block solids. If no block solids exist for a bench, the bench solid displays.
-
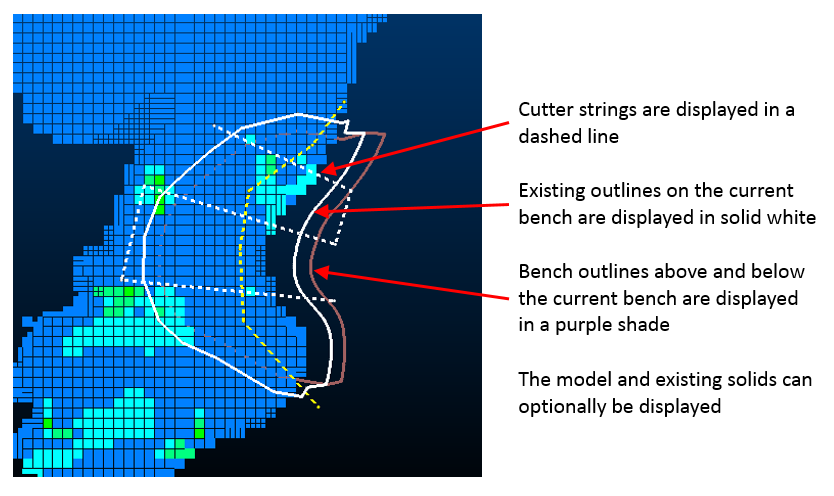
Outlines – Display existing outlines, including bench outlines.
-
-
Define cutter strings for the selected bench.
-
New String – Run the new-string command to define a new cutter string on the current bench. Use general editing tools, such as the shape editing tools on the Edit ribbon, to refine the string.
-
Import – Import cutter strings from an external file. Imported cutter strings combine with strings you digitise in the task.
-
Clear – Remove cutter strings from the current bench.
-
Copy from Above – Copy cutter strings from the bench above and merge them with any existing strings on the current bench.
-
Replace with Above – Replace cutter strings on the current bench with strings from the bench above. If the bench above has no cutter strings, this clears strings from the current bench.
-
Replace Subsequent – Replace cutter strings on all benches below the current bench with the current strings. If the current bench has no strings, this removes all subsequent bench strings.
-
Copy from Bench Outlines – Copy the existing bench outline and offset it inwards by a set distance. Click Copy to create the cutter string.
-
-
Optionally generate Cutter Strings automatically for the selected bench.
-
Enter the Density and Tonnes values you want for each block.
-
Click Cut to generate new cutter strings for the bench. This replaces any existing cutter strings.
-
Select Randomise to generate a different result. This changes the cutter string generation seed each time you click Cut.
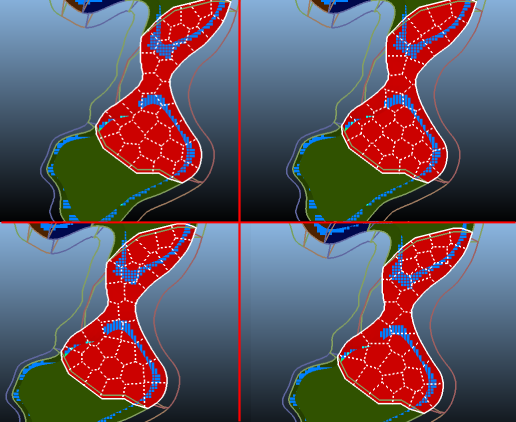
Example of auto-cut bench strings and randomised output based on the same density and tonnage requirements.
-
-
Select how you want to handle minimal volume or thickness blocks, for example ignore the data or merge it:
Merge solids with an area below: merge blocks below the specified area with a neighbour block with which each block shares the largest shared perimeter length. Merging is performed before any subsequent noise removal is applied, using other settings on this panel.
Remove solids with volume below: Any individual block solid that is generated with a volume below the amount specified is automatically removed. This allows insignificant and non-mineable volumes to be ignored.
Remove solids with maximum thickness below: Any individual solid that is generated by the intersection of the Phase DTM with the topography with a thickness below the amount specified is automatically removed. This allows very thin and non-mineable volumes to be ignored.
Note: If selected, merging of blocks with small areas is performed first. Once merging is complete, removal of blocks with a volume or thickness lower than the specified threshold is performed simultaneously afterwards.
-
Generate or clear mining block outlines and solids.
-
Generate – Generate mining block outlines and solids for the current bench.
-
Generate All – Generate mining block outlines and solids for all benches in the selected phase. If a bench has no cutter strings, a single mining block is created.
-
Clear – Clear mining block outlines and solids on the current bench.
-
Clear All – Clear mining block outlines and solids for the selected phase.
-
Note: This function is a simpler version of the block-generation routines used in Auto Block Creation. Auto Block Creation attempts to honour optimisation parameters such as duration and mining rate, whereas this panel is useful when you already know the approximate tonnage and density expected per block.
One approach is to automatically generate blocks, then review each bench and recreate cutter strings manually or automatically as required.
Related topics and activities: