
Pit Design Scenarios
Note: This task is part of Interactive Pit Design functionality.
The Auto Pit Design task is the main console for generating pit data from constraint strings, slope regions, bench definitions, road definitions, and pit or phase information.
Each scenario is defined using a combination of the following panels.
- The Auto Pit Design panel.
- The Conditioning panel.
- The Berm Tapering panel.
While scenarios can be defined using the Auto Pit Design task, you can select predefined scenarios if you are using the Generate Ramp Layout task, allowing you to experiment with different layouts for each scenario.
Scenario Settings
Each scenario contains all settings that are particular to a design. This includes:
- The pit and phase to be represented by an automated design.
- The constraint strings used to instruct the design of the pit shell.
- All adaptive and fixed road settings.
- The design direction (top-down or bottom-up).
- Pit conditioning settings such as blending distance, maximum width changes, area, deviation, and inside or outside fillet radii (either for the whole design or for specific benches). See Auto Design - Conditioning.
- Berm tapering settings including the road taper distance and width for both inside and outside, and a flat road distance. See Auto Design - Berm Tapering.
Changing a scenario automatically reinstates previously saved settings for the pit and phase combination. You are prompted to save data if any unsaved changes are detected when swapping scenarios or creating a new scenario.
Scenario Naming convention
By default, when creating an automated pit design for the first time, a scenario is created. Each scenario is named automatically using the following naming convention.
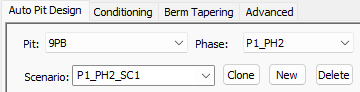
Pit ID_Phase ID_Scenario ID.
For example, for phase “P1_PH1” (pit 1, phase 1), the default scenario name for the first design is “P1_PH1_SC1”, followed by “P1_PH1_SC2”, and so on. This naming system is automatic and updates each time a new Pit or Phase is selected in the Auto Pit Design task.
Creating a Scenario
All scenario creation is performed using the Auto Pit Design task.
To create a new scenario, you can either:
- Create a new scenario using all default settings. This means the design is completely new, requiring constraint string data to be selected and all road and conditioning or tapering settings to be defined. To create a brand new scenario, use the New button.
- Copy the current settings to a new scenario. This is useful if you want to assess the impact of changing specific parameters on the resulting design and volume evaluation. This duplicates all current settings, including road definitions, to a new scenario. To copy the existing scenario, use the Clone button.
Deleting a Scenario
To delete a scenario, ensure it is selected in the Scenario field, then click Delete. All settings and associated data for the scenario are deleted. You cannot undo this operation, but you are asked to confirm your decision.
Related topics and activities