Generate Grids in Outlines
To access this screen:
-
Edit ribbon >> Shapes >> Outlines >> Generate Grids in Outlines.
-
Digitize ribbon >> Create >> Outlines >> Generate Grids in Outlines.
-
Using the command line, enter "generate-grids-in-outlines"
-
Use the quick key combination "gio".
-
Display the Find Command screen, locate generate-grids-in-outlines and click Run.
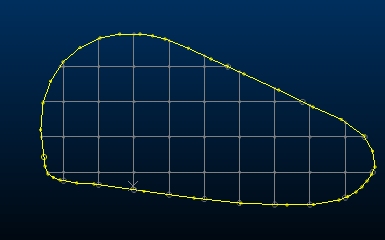
Generate a regular grid of strings within selected outline string data.
Select the origin of the grid, then the size of the grid intervals. Specify a grid angle using the Azimuth setting.

Grid data is added to the current object, which can be independent of the closed outline data used to constrain the grid.
Important: closed string data must be selected before you can Generate grid strings. Multiple closed strings can be selected.
To generate a grid of strings within an enclosed outline:
-
Load and select a perimeter string so it is highlighted in a 3D window.
-
Enter an X and Y coordinate to define a known Anchor Point, or pick the origin point of the grid in a 3D window.
-
Enter the Azimuth Degrees for your grid, or select a string in any 3D window to match the azimuth of the selected item. Snapping is supported if selecting a string to define the azimuth.
-
Enter the Grid Dimensions by defining a Length and Width of each grid interval. This is used consistently throughout the grid.
Related topics and activities
-
generate-grids-in-outlines (command)

