|
|
Generating Ramp Outlines Contours method: generating ramp outlines from ramp design strings |
Overview
In this part of the tutorial you are going to generate ramp outlines from ramp design strings.
|
The Contours design method involves inserting ramp and crest strings into an existing set of toe contour strings. These toe strings are typically created by generating contours around an optimum pit shell block mode at the bench toe position. |
Prerequisites
Required:
-
Created a new project and added all the required tutorial files i.e. the exercises on the Creating a New Project page.
-
Loaded and viewed the ultimate pit shell model data i.e. the exercises on the Viewing Ultimate Pit Shell Models page.
-
Created and applied a custom legend, filtered cells, for the NPVS block model i.e. the exercises on the Creating a Custom Display Legend page.
Recommended:
-
Specified project and mine design settings i.e. the exercises on the Specifying Design Settings page.
-
Created ramp design strings i.e. the exercises on the Creating Ramp Strings page.
Files required for the exercises on this page:
-
_vb_c_pitrampds
Link to Exercises
The following exercises are available on this page:
Exercise: Generating Ramp Outlines from Strings
In this exercise you are going to use the bench toe contours and ramp design strings object _vb_rc_pitrampds as a starting point for generating ramp outlines from the ramp design strings. This includes the following tasks:
-
Defining data and design plane settings
-
Saving to a new strings file
-
Generating the ramp outline
-
Saving the data.
Defining Data and Design Plane Settings
-
Select the Design window.
-
In the Project Files control bar, Strings folder, drag-and-drop the following file into the Design window:
-
_vb_c_pitrampds
-
-
In the Sheets control bar, Design Overlays folder, select only the following overlays (i.e. display these overlays):
-
Default Grid
-
_vb_c_pitrampds (strings)
-
-
In the View Control toolbar, click Zoom All Data.
-
In the View Control toolbar, click View Settings.
-
In the View Settings dialog, define the parameters shown below, click OK:

-
In the View Control toolbar, click Zoom In.
-
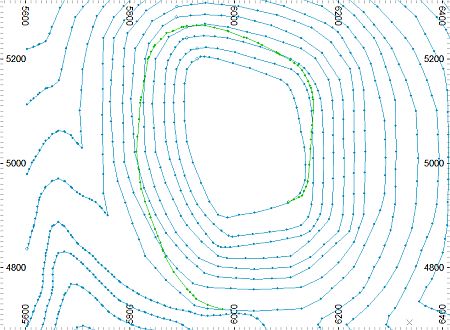
In the Design window, drag a zoom rectangle to display the view extents shown below:


In the above image the green ramp design string starts at the southern side of the lowest bench (-40m elevation) and spirals upwards and outwards, in an anti-clockwise direction, stopping at the 100m elevation toe contour. The ramp string has a gradient of 12%.
Saving To a New Strings File
-
In the Loaded Data control bar, right-click on the _vb_c_pitrampds (strings) object, select Data | Save As.
-
In the Save New 3D Object dialog, click OK.
-
In the Save New Strings dialog, select the path to your tutorial folder 'C:/Database/MyTutorials/OPDesign', define the File name: as 'c_pitrampOut.dm', click Save.
-
In the Loaded Data control bar, check that _vb_c_pitrampds (strings) has been replaced by c_pitrampOut (strings).
- Check that c_pitrampOut (strings) is the current strings object i.e. highlighted bold.
Generating the ramp outline
-
In the Design window, right-click and select Deselect All Strings (das).
-
Select Applications | Open Pit | Road Layout Tools | String to Road (stro).
-
In the Design window, select (left-click) the green road design string.
-
In the Studio 3 'Delete control design string' prompt dialog, click Yes.

An alternative (and perhaps more cautious approach) would be to NOT delete the control string at this stage, but to manually delete it once your are satisfied that the ramp outline has been generated correctly. If the ramp outline is lying on top of (and obscuring) the ramp control string, both strings can be selected by dragging a box and then using <Ctrl> + Left-click to deselect the ramp outline, before erasing the ramp control string.
-
In the Studio 3 control string type dialog, define Type as 'R', click OK.

If the road design string was created in a clockwise direction, the control string edge type would be L (Left).
-
In the Studio 3 Road Width dialog, define Width at Road Start as '20', Width at Road End as '20', click OK.
-
Click Cancel.
-
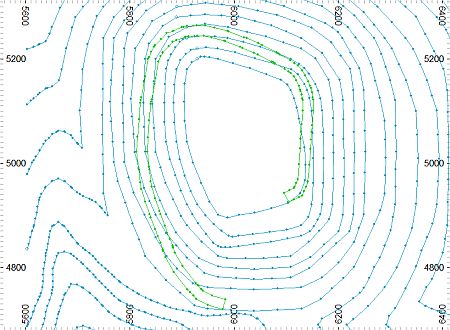
In the Design window, check that your green ramp outline is a shown below:

-
Select Format | VR View | Update VR Objects (vro).
-
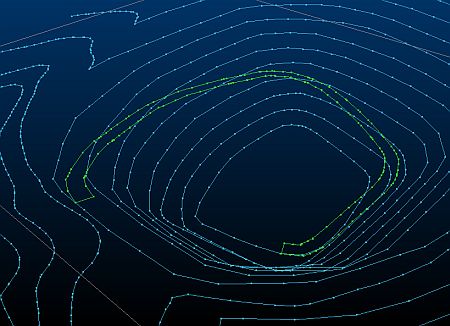
In the VR window, rotate, pan and zoom the view, noting the position of the ramp outline relative to the bench toe contours:

Saving the Data
-
Select File | Save.
-
In the Save Data/Set Auto Reload dialog, select to Save the c_pitrampOut (strings) object, click OK.
|
You can check your design strings against the example file _vb_c_pitrampout.dm. |
Copyright © CAE Inc.
MIN 20048_00_EN

