Connection with a Fusion Database
The top of the first page of the wizard links Isatis.neo to the Fusion data source you will import the data from. There are two ways of doing that:
-
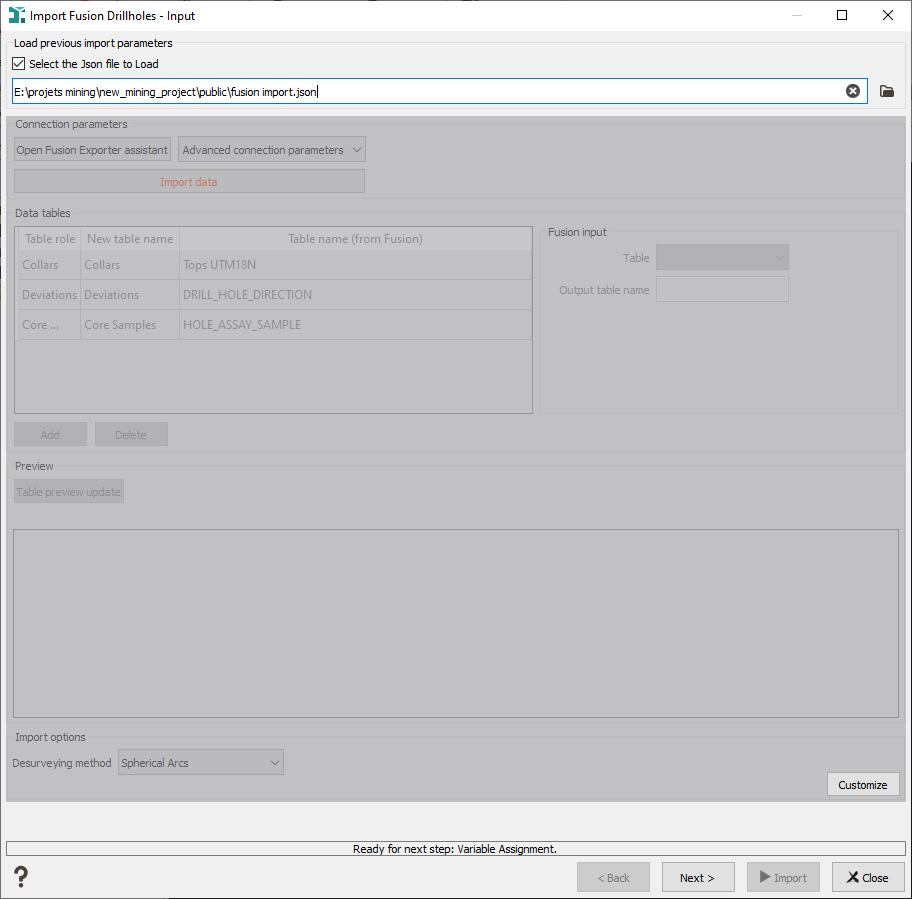
Load a previous import parameters file:
- Tick the top option Select the JSON file to load.
- In the file selector, select the .JSON file in your computer. The .JSON file must have been generated previously, at the end of the Fusion import task (so you need to set the parameters at least once in the Fusion task).
- A confirmation message pops-up when loading a .JSON file. If the loading is successful, the Fusion task is now in Loaded mode. All the parameters are automatically set and the interface is greyed. Press next until the last page to name the output file.
- However, if you want to change some parameters, it is possible. A Customize button on the bottom right corner of each page allows the user to edit the parameters in case one wants to change them. Then, the pages are unlocked. The wizard is not on Loaded mode anymore, it is customized. In the Summary page (last page of the wizard), you can save the current parameters in a .JSON file. By default, the file is located in the Public folder of the project. Once the parameters have been saved, the task switches back to Loaded mode, with the newly saved file as import parameters file.
The .JSON file contains the type of import (Fusion here), the geometry type (lines), the Fusion connection parameters, the selected tables and variables, with chosen attributes (roles, units, etc.) and the output file name. It does not contain the option to display the results.
-
Connect the Fusion database:
-
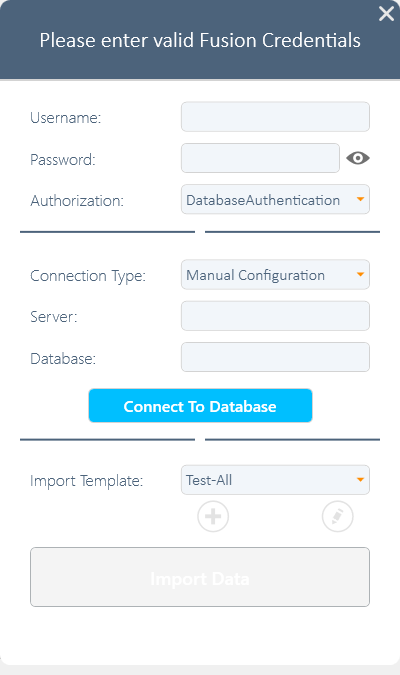
The button Open Fusion Exporter Assistant launches the Fusion Exporter configuration tool.
- Username: to authenticate on the database
- Password: password for that username
-
Authorization: Choose between DatabaseAuthentification and MicrosoftAuthentification.
If MicrosoftAuthentification is selected, we will use the user’s windows login as a way to authenticate instead of using a password. This will only works if your SQL server has been configured to allow windows authentication.
-
Connection Type: Choose between Manual Configuration and Data Source Name.
If the Data Source Name is selected, you only have to write the name of the Data Source.
-
If the Manual Configuration is selected, you have to fill:
-
Server: Name/IP address of the host that runs the SQL Server, and the name of the SQL server on that host
Format: HOST\SERVERNAME
- Database: Name of the Fusion Database on the SQL server.
When all the fields are filled, you can connect to the Database. Then, you can select an Import Template (already created in Fusion) and import its data tables.
Note: See How to create a Fusion Template? if you don’t have templates available.
When validating the parameters from the Fusion dialog, there are kept for a future session in the Advanced connection parameters near the open dialog button.
When re-entering the task later, if the advanced connection parameters have already been filled, you can directly click on the Import button: it will import the queried tables.
-
-


