How to register a data source or create a DSN file?
Register a data source
To register a data source, you will need to install a database editing or management software (e.g.: Microsoft Access, acQuire, MaxGeo Datashed, Microsoft SQLServer (MSSQL), PostgreSQL, etc.) and the corresponding driver (it should be automatically installed along with the main software or database but might also be installed separately).
Note: There is a problem with some editions of Microsoft Office and Access that won’t correctly install the correct ODBC drivers for Access when installing Office. The drivers would need to be downloaded and installed separately. Use your favorite search engine to download Microsoft Access Database Engine Redistributable (or use this website).
The following steps are done in the Windows menu of the computer. It may be slightly different (layout and location) depending on your operating system. We are using Windows 10 in the example.
-
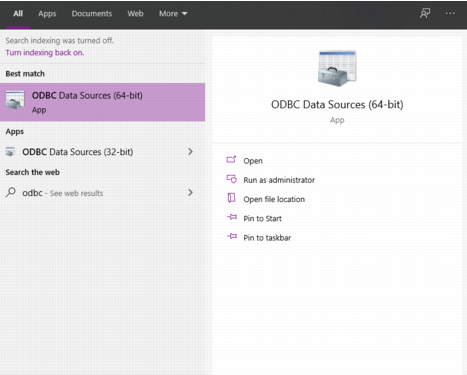
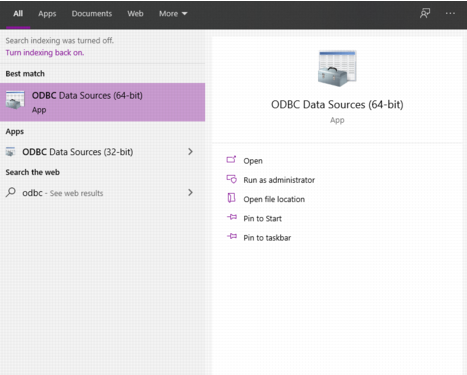
Open the "ODBC Data Sources (64-bit)" tool from the Start Menu (search bar) of Windows.
-
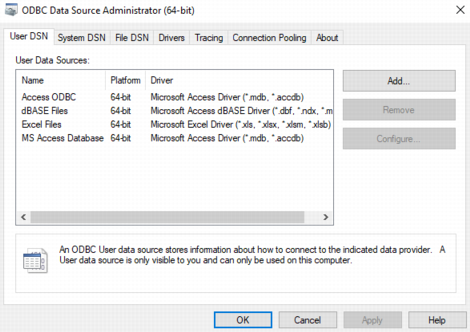
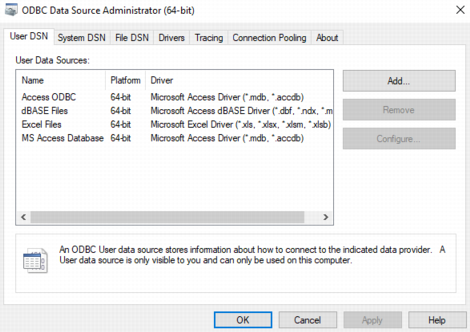
You will have a windows that pops-up.
- Go to the "User DSN" section to register the data source for the user only (the person who is currently logged on the computer), or go to the "System DSN" section to register the data source for all the users of this computer.
- In this example, we are going to register a data source for the user only, so using the "User DSN" section.
-
Press the Add button on the right to add a data source.
-
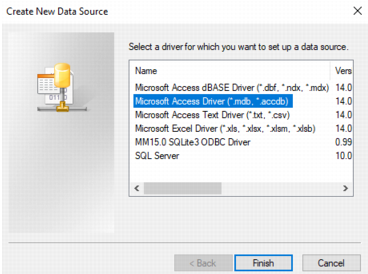
Select the driver corresponding to the database format you want to use. By default, you should have the drivers of the database applications loaded on the computer.
We are going to use a database with the extension .ACCDB created with Microsoft Access. (To know the format of your database, just check the extension of your database file where it is located.) We select the driver named "Microsoft Access Driver (*.mdb,*.accdb)".
Press Finish. A new windows pops-up.
-
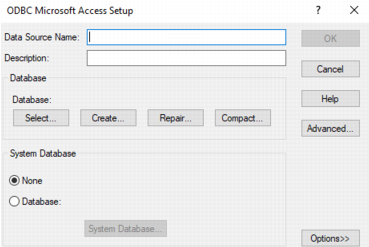
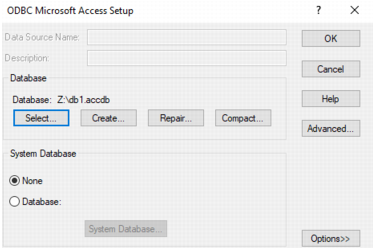
This window will configure the link between the driver and the database you want to use. This link is made to connect a driver to only one database.
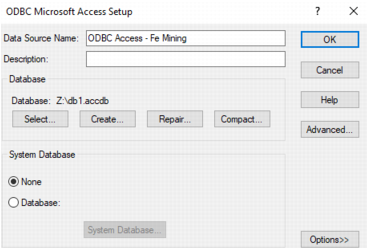
Name the Data source to identify it later. It may be good to remind the format of the database and the content of the database (e.g.: ODBC Access - Fe Mining).
Use the button "Select..." to select on your computer the database you want to use.
-
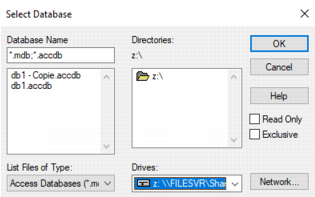
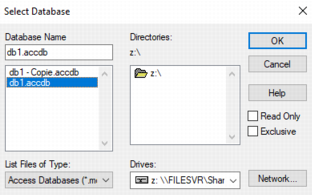
The Database Name on the top left shows the database extensions that can be detected. On the center of the window, you can see one directory and the available content. You may need to change the directory on the bottom ("Drives") to select the one where the database is located. When the directory with the database is selected, the available database(s) are written on the left.
In my example, there are "db1 - Copie.accdb" and "db1.accdb" that are both located in the Z: disk.
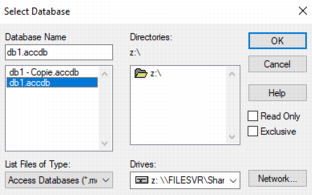
Select the database to connect. The database name is updated in the "Database Name" field on the top left. Press OK.
-
Then, the previous window closes and you continue with the Setup. The database name has been updated in the central area, so you can check the selected disk and database. Press OK.
- The new datasource name has now been added to the user data sources in the "ODBC Data Source (64-bit)" window. Press OK and close the window.
- The datasource name is reachable from Isatis.neo software in the ODBC Import task.
Create a DSN file
The DSN (Data Source Name) file will connect the driver to the database you want to use. This file can be shared by users who have the same drivers installed, so they easily have the ODBC connection to the database of interest. However, the database should be located at the same location on the different computers (same disk, folder, filename). The DSN file is a simple text file, so it is also possible to edit it through a text editor (e.g.: Notepad++, Visual Studio Code) and to write the correct location on the new computer.
To create a DSN file, you will need to install a database editing or management software (e.g.: Microsoft Access, acQuire, MaxGeo Datashed, Microsoft SQLServer (MSSQL), PostgreSQL, etc.) and the corresponding driver (it should be automatically installed along with the main software or database but might also be installed separately).
Note: There is a problem with some editions of Microsoft Office and Access that won’t correctly install the correct ODBC drivers for Access when installing Office. The drivers would need to be downloaded and installed separately. Use your favorite search engine to download Microsoft Access Database Engine Redistributable (or use this website).
The following steps are done in the Windows menu of the computer. It may be slightly different (layout and location) depending on your operating system. We are using Windows 10 in the example.
-
Open the "ODBC Data Sources (64-bit)" tool from the Start Menu (search bar) of Windows.
-
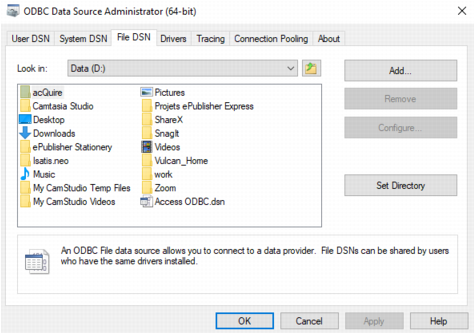
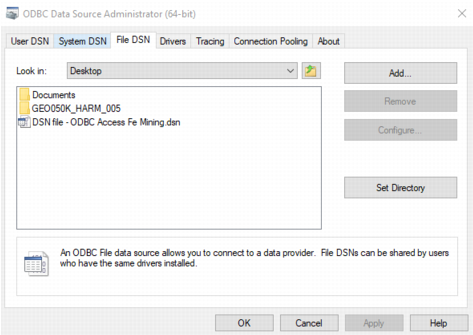
You will have this windows that pops-up.
-
Go to the "File DSN" section to create the new DSN file.
-
In the field "Look in" select the disk to save the new file location. Press the Add button on the right to add a DSN file.
-
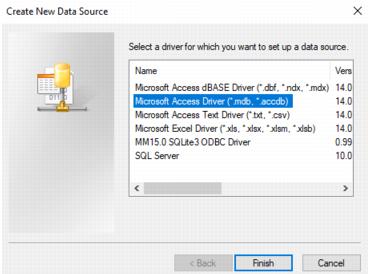
Select the driver corresponding to the database format you want to use. By default, you should have the drivers of the database applications loaded on the computer.
We are going to use a database with the extension .ACCDB created with Microsoft Access. (To know the format of your database, just check the extension of your database file where it is located.) We select the driver named "Microsoft Access Driver (*.mdb,*.accdb)".
Press Next.
-
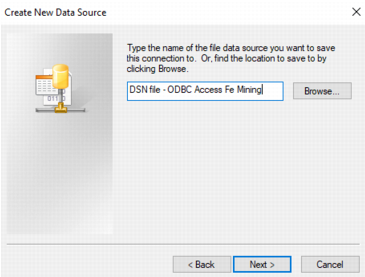
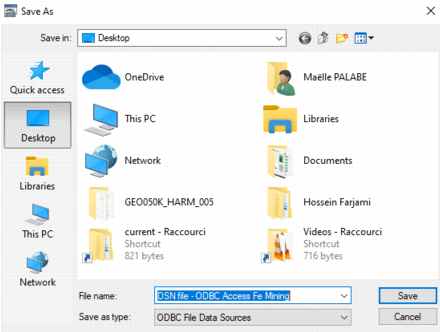
Write the name of the DSN file that will be created. It may be good to remind the format of the database and the content of the database (e.g.: DSN file - ODBC Access Fe Mining).
By clicking on "Browse" you can select the location of the DSN file if you want to modify the default.
In the example, we are going to save the file in the Desktop.
-
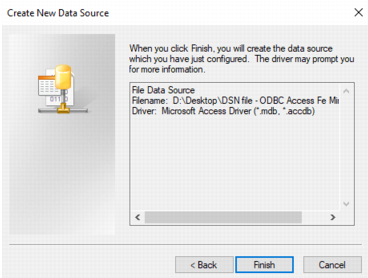
A summary with the DSN file name and location, and the driver name is printed. If correct, press Finish to finish the setup. A new window pops-up.
-
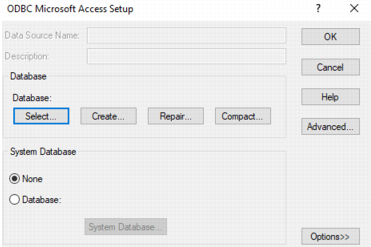
This window will configure the link between the DSN file and the database you want to use. This link is made to connect a DSN file to only one database.
Use the button "Select..." to select on your computer the database you want to use.
-
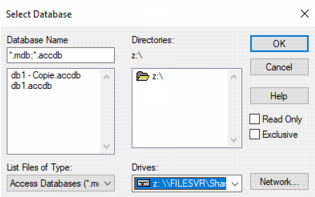
The Database Name on the top left shows the database extensions that can be detected. On the center of the window, you can see one directory and the available content. You may need to change the directory on the bottom ("Drives") to select the one where the database is located. When the directory with the database is selected, the available database(s) are written on the left.
In my example, there are "db1 - Copie.accdb" and "db1.accdb" that are both located in the Z: disk.
Select the database to connect. The database name is updated in the "Database Name" field on the top left. Press OK.
-
Then, the previous window closes and you continue with the Setup. The database name has been updated in the central area, so you can check the selected disk and database. Press OK.
-
The DSN file has now been added in the "ODBC Data Source (64-bit)" window. To view it, you may need to select the correct directory in the "Look in" field.
In the example, the DSN file has been saved in the Desktop.
Press OK and close the window.
- The DSN file is now reachable from Isatis.neo software in the ODBC Import task.
On Linux
On Linux, Isatis.neo uses unixODBC to access ODBC drivers.
Two configuration files are used to register drivers and datasources:
- odbcinst.ini (generaly in /etc) is used to configure odbc drivers
- odbc.ini (generally in /etc/ for system datasources, and in $HOME for user datasources) is used to configure datasources.
Those files can be looked for at different places by changing some environment variables in the environment you will run Isatis.neo:
- ODBCSYSINI: Overloads path to unixODBC configuration files. By default equals to '/etc'.
- ODBCINSTINI: Overloads the name of the drivers configuration file. It is relative to ODBCSYSINI and by default set to 'odbcinst.ini'.
You can read in the documentation of the ODBC drivers you want to use to know which information you have to add to those files.
To test your configuration, the command odbcinst can be used. The presence of this command is a good indication that you have all necessary packages installed on your distribution.
Examples of odbcinst usage:
- odbcinst -j will print the folders where drivers and datasources configuration will be looked at.
- odbcinst -q -d will list the configured drivers.
- odbcinst -q -s will list the configured datasources.

