Assign Plot Template
This is the first of a series of activities relating to field map reporting configuration.
Warning: This topic is intended for Studio Mapper system administrators. You should not attempt any of the following procedures unless you are authorized to do so, and are familiar with the concepts described.
Studio Mapper PDF reports are formatted by associating a plot template with at least one map type using the system's system configuration file.
You can set up multiple configurations if required, e.g., a single face report can be associated with a specific template, and a heading report with a different template.
Warning: Updating system components can impact all users of the active Studio Mapper database and/or system configuration file. Changes should be made in a safe, testable environment before rolling out to a live system.
This activity references a hypothetical system configuration file, and associates a map type definition with a report template name. This template doesn't exist yet, but the map faces represented in the final report will be referenced by name, and in the order expected.
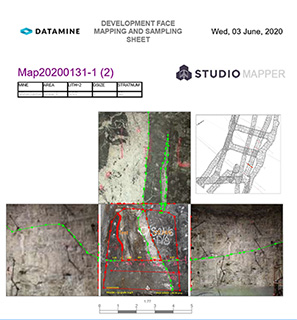
In the activity example you set up a report displaying four map faces and a 3D projection of the georeferenced map, as shown below:

A <MapType> definition is used to associate a map type with a template. A separate definition is required for each heading type and for each report template that will be used. In this example, you define a full heading type with front, left, right and top face maps.
To associate a plot template with a map type:
-
Locate the system configuration file associated with your project. If one hasn't been specified, you either need to create and associate one now, or link to an existing file (that can be modified) using the Setup | Database tool. If required, get the latest configuration file from the CENTRAL database. See Assign a Configuration File.
-
Open the configuration file in any ASCII text editor.
-
Modify or append the file. In this example, the name displayed in Studio Mapper during map creation is "Full Heading" comprising four faces (FRONT, TOP, LEFT and RIGHT). The plot template (configured in a subsequent activity) has the name "4_Faces.dmtpl".
<MapType>
		  <Name>Full Heading</Name>
		  <Sides>FRONT,TOP,LEFT,RIGHT</sides>
		  <ReportTemplate>4_Faces</ReportTemplate>
</MapType>Note: <Name> is unique to the configuration file (multiple
MapTypedefinitions may exist for a single project). You don't need to specify the file extension (.dmtpl) for a report template name
Next, see Define Report Sections.
