|
|
Scatter Plots - Preview Using the Scatter Plot preview area |
Previewing Scatter Plot Data

To access this area:
-
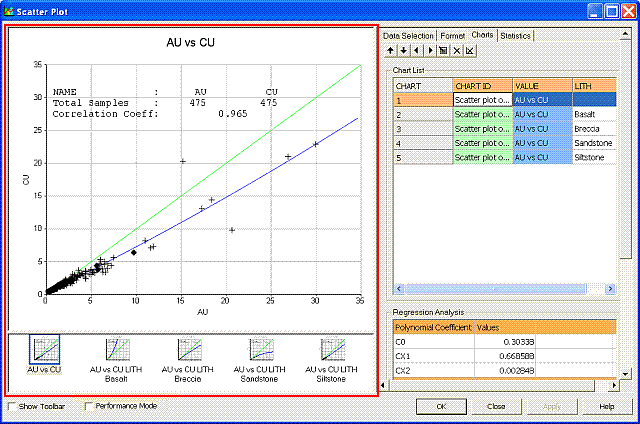
Double-click an existing Scatter plot item or sheet. The Scatter Plot Preview area is permanently fixed on the left side of the Scatter Plot dialog.
The Scatter Plot dialog's preview area is used to select and preview a chart.

The Preview Toolbar
The preview area has a dedicated toolbar which can be displayed by selecting the Show Toolbar check box at the bottom of the dialog:
![]()
Once enabled, the toolbar is revealed, and can be repositioned as required using drag-and-drop.
Field Details:
The Preview toolbar contains the following functions:

Save as Image: saves the current chart image to a standalone image file. Files can be saved in .bmp, .jpg, .jpeg, .tiff, .gif or .emf formats.
Copy to Clipboard: copies the contents of the preview area to the clipboard. This information can be pasted into any external application that supports the pasting of image metadata. For more information on how to paste into external applications, please refer to the relevant documentation for the system in context.
Print: allows you to send the displayed chart to any supported local or network printing device. Note that this function will launch your system's proprietary print control dialog, and you should refer to your system documentation for more details on how to set up particular printing formats for your hardware.
Print Preview: allows you to preview your hard copy output using the Print Preview dialog. More...
3D Mode: this toggle enables and disables 3D chart mode. If this option is enabled, you can rotate the chart in the preview area by dragging the mouse with the right-button held down. If the option is disabled, a 2D flat view will be set and no rotation can be performed.
Show/Hide Legend: this toggle enables and disables the chart legend - it is displayed by default.
|
|
All chart formatting controls are chart-independent. Swapping from one chart to another using the Charts tab, for example, will automatically update the settings to be relevant to how they were last set for the chart in question. |
|
|
If a chart legend is displayed, you can double-click the legend item's legend block or label in the preview panel to open up theChart Series Styledialog orLegend Propertiesdialog respectively, for further formatting options. |
Performance Mode
When working with large data sets, the speed performance of the Scatter Plot dialog e.g. while generating and refreshing chart previews, can be increased by selecting the Performance Mode option. This is located below the Chart Thumbnails and Preview Panes:
![]()
Once selected (ticked), the chart thumbnails and the histogram chart plot item will be temporarily hidden; these can again be displayed by turning this option off.
Context Menu Options
Right-clicking in the preview area displays the following context menu:

Field Details:
Tooltips:
|
|
These are displayed in a tooltip popup, in the preview pane, when the cursor is hovered over a scatter plot data point . |
Display Value Field: show/hide the value field name and value.
Display Key Field: show/hide the key field name and value. This is the Key Field defined in the Data Selection tab.
Display X Axis: show/hide the X Axis data value (shown by default). This is the X Axis defined in the Data Selection tab.
Display Y Axis: show/hide the Y Axis data value (shown by default). This is the Y Axis defined in the Data Selection tab.
Interactive Data Selection
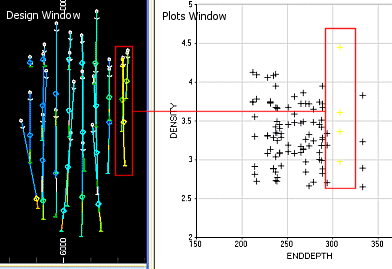
If drillhole or points data is selected in the Scatter Plot dialog as a loaded data object then the preview panel's functions are expanded to allow you to 'link' to the Design window. This connection allows you to select an interval in a graph and have that selection of data automatically highlighted in the Design window. Similarly, if data is selected in the Design window, the corresponding scatter plot data points are highlighted in the Scatter Plot dialog, e.g.:
This interactive selection is currently implemented for:
and not for:
|
Automatic data highlighting in theDesignwindow requires theAutomatic Redrawmode to be active. To check the status of this option (and enable it if necessary), you will need to;
|
|
| | Related Topics |
|


