
On-Screen Keyboard
Entering data values on a portable device in a light-restricted environment, wearing safety gear and under pressure to make way for the next shift, can be difficult.
Studio Mapper features an automatic on-screen keyboard that you can use to tape data values easily whilst working at the face.
Toggle the keyboard mode using the Setup ribbon's On-Screen Keyboard button:
-
If active, clicking into an editable field automatically displays an on-demand and on-screen keyboard of the appropriate type (either to enter integers, decimals or alphanumeric values).
-
If inactive, no on-screen keyboard displays when an editable field is activated.
If active, the keyboard displays for as long as it is needed, and automatically hidden when a data field is selected. This helps you swap between data entry and digitizing in the map view easy.
Regardless of the keyboard type, a red ESC key is available to dismiss the keyboard. Data is committed using the green ENTER arrow, which emulates the same key on a physical keyboard.
Navigate around the screen using directional arrow keys. This will update the keyboard type if necessary (say, if you switch from a numeric to an alphanumeric field. See "Keyboard Types", below).
Using the Clipboard
All keyboard types feature buttons to quickly copy a value to the clipboard, then paste it into another field:
![]()
-
Copy the currently typed value to the clipboard.
-
Paste the value stored on the clipboard to the currently selected table cell or field.
Positioning the Keyboard
Your virtual keyboard, like many elements of your application layout, can be positioned where it's most convenient.
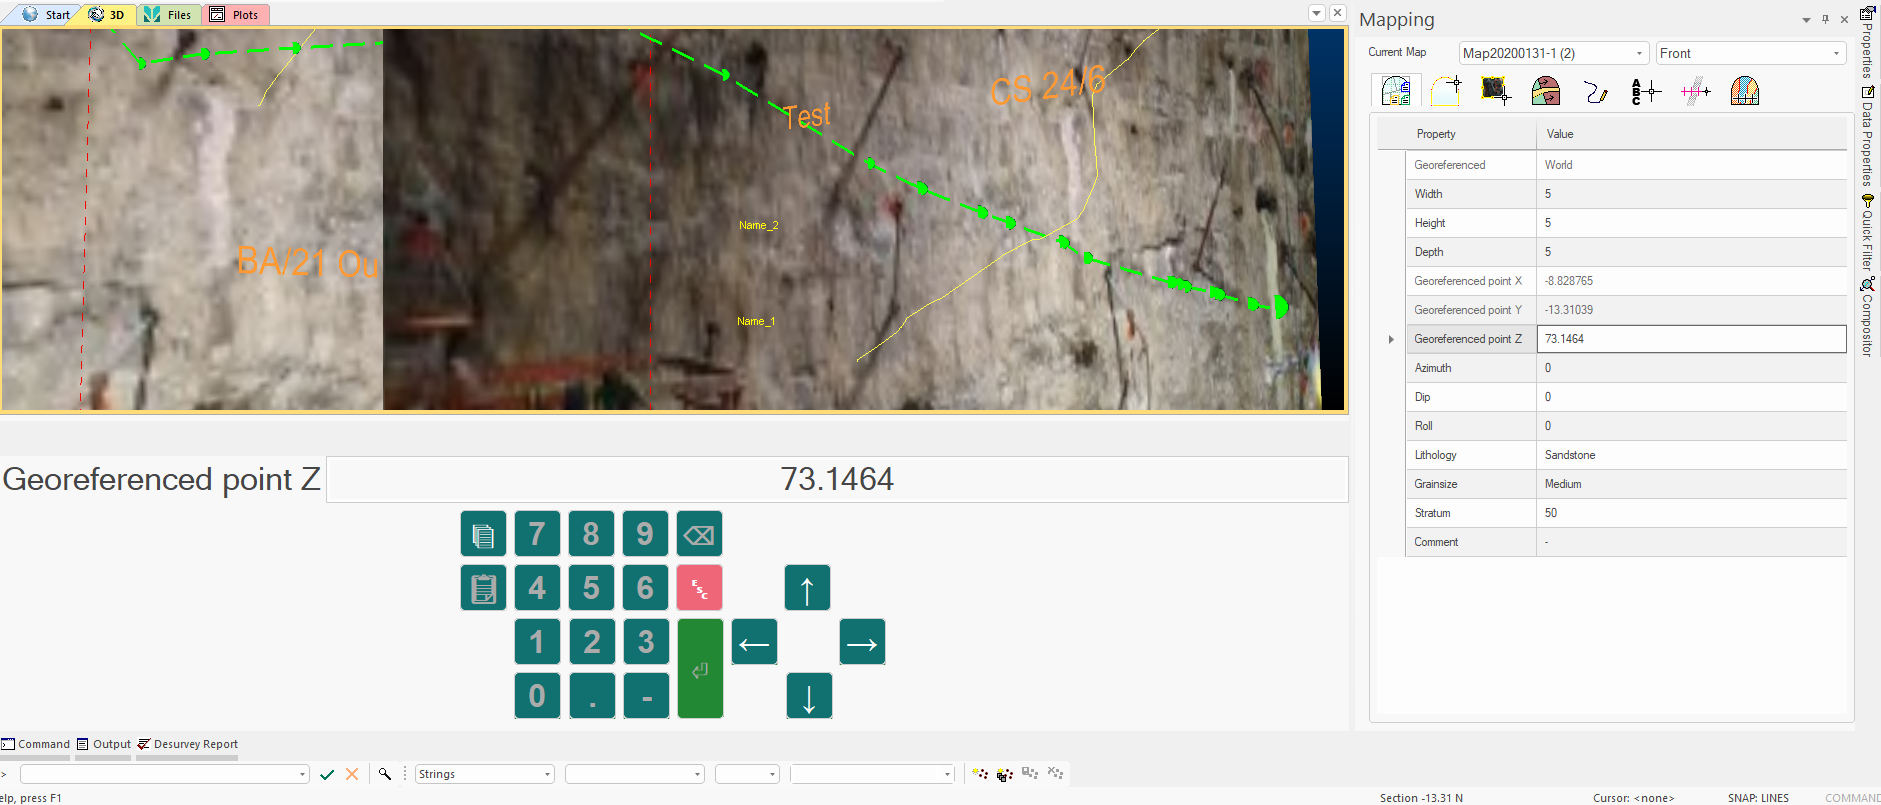
As a "control bar", the keyboard can either be docked or floating. By default, the keyboard is docked underneath the 3D and Map window, for example:
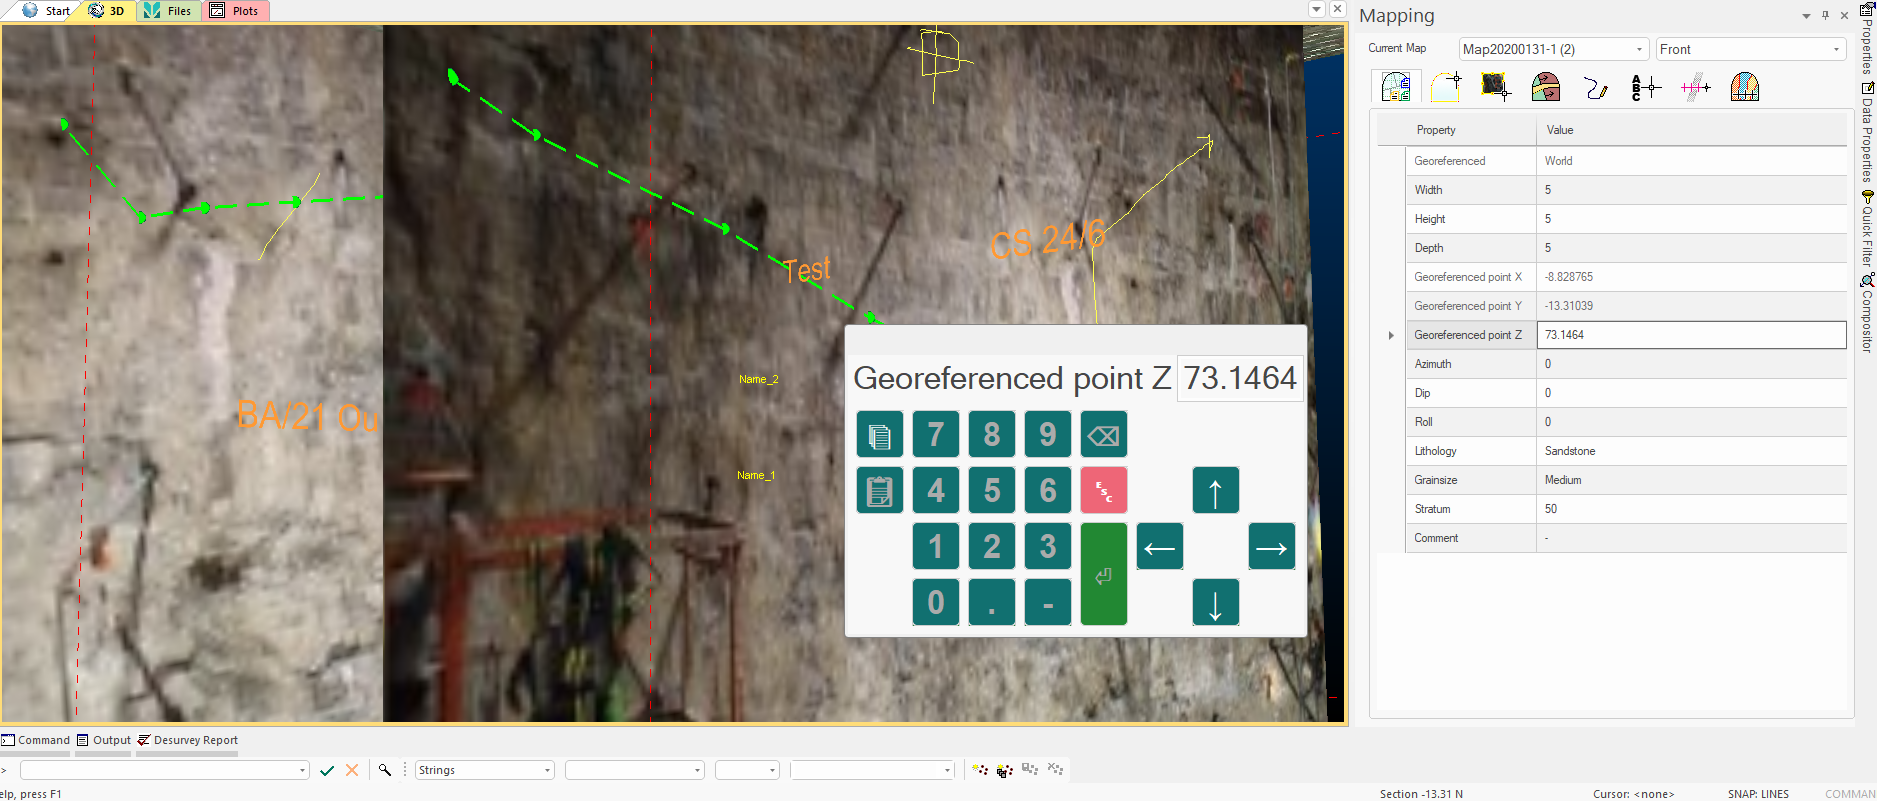
By tapping the title bar of the keyboard and holding the stylus on the screen, you can convert the keyboard to a floating equivalent, which can be positioned anywhere you like:
Dock a floating keyboard to the sides of the application by dragging it over one of the 'anchor points'. You'll know you've reached a dockable position as the docking area highlights, like this:
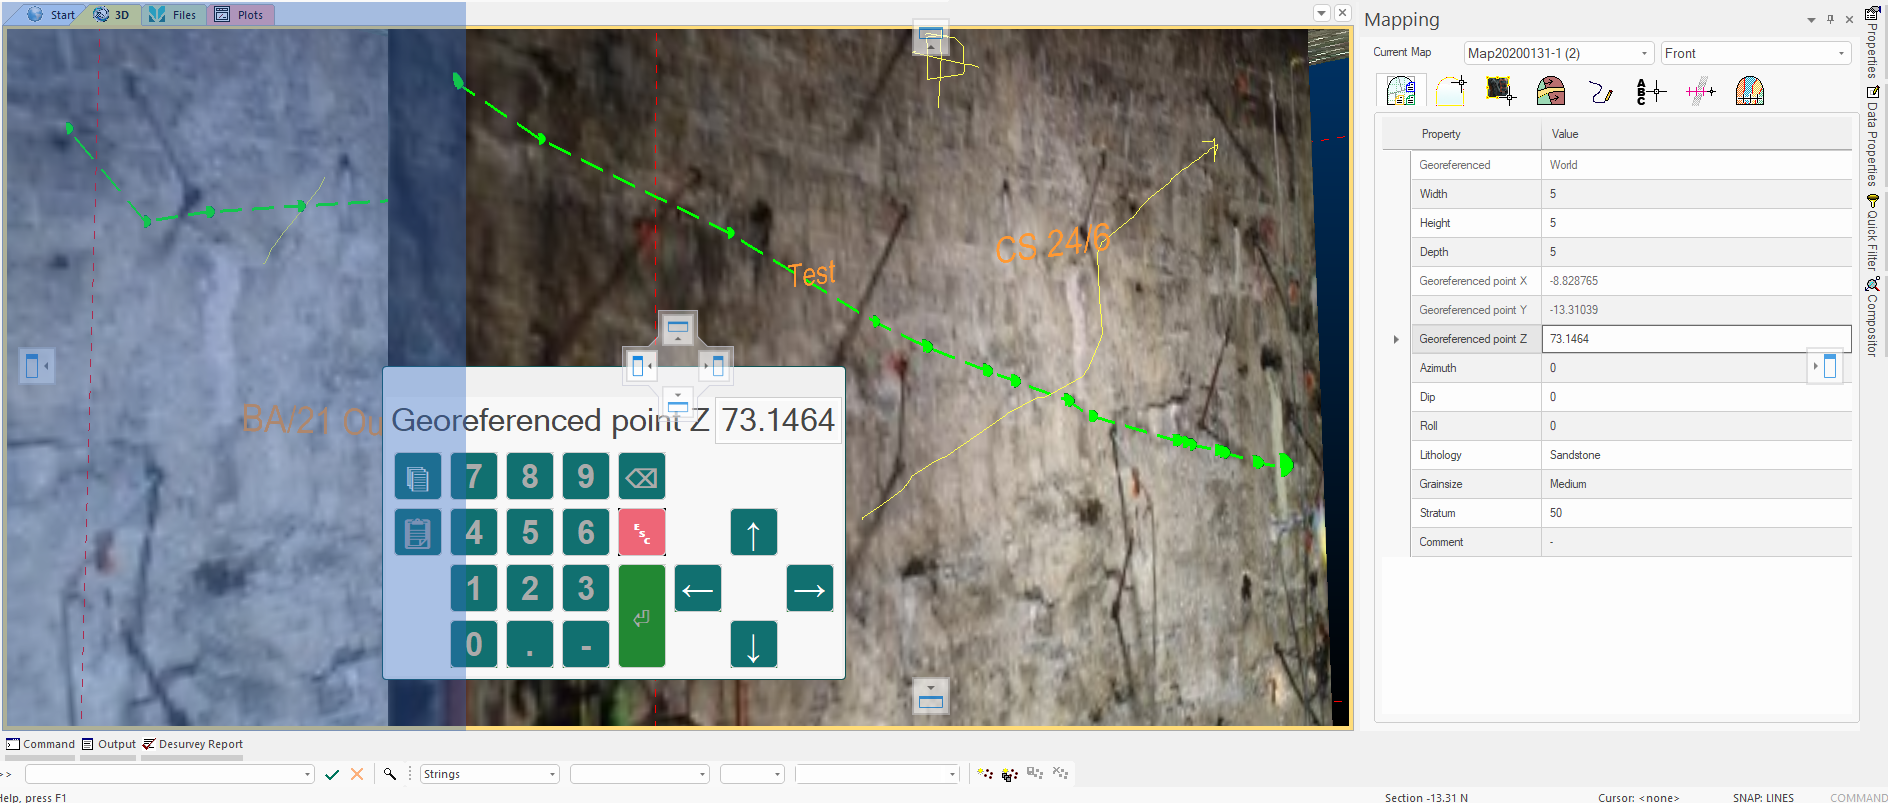
Lifting the stylus once a docking area is reached snaps the keyboard to that location, for example:
The position of your keyboard is recalled during future application sessions. All projects will utilize the same layout.
Also, see Customizing Control Bars.
Keyboard Types
The type of keyboard displayed depends on the type of data you are entering. For each data type (numeric integers, numeric decimals, alphanumeric) a different keyboard type displays.
Even if a field is read-only, a keyboard still pops up when you tap on it. This is because you may want to copy the read-only value to the clipboard for use elsewhere.
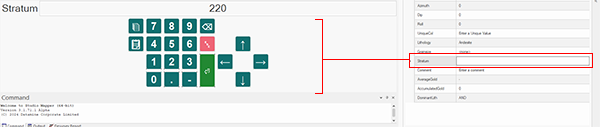
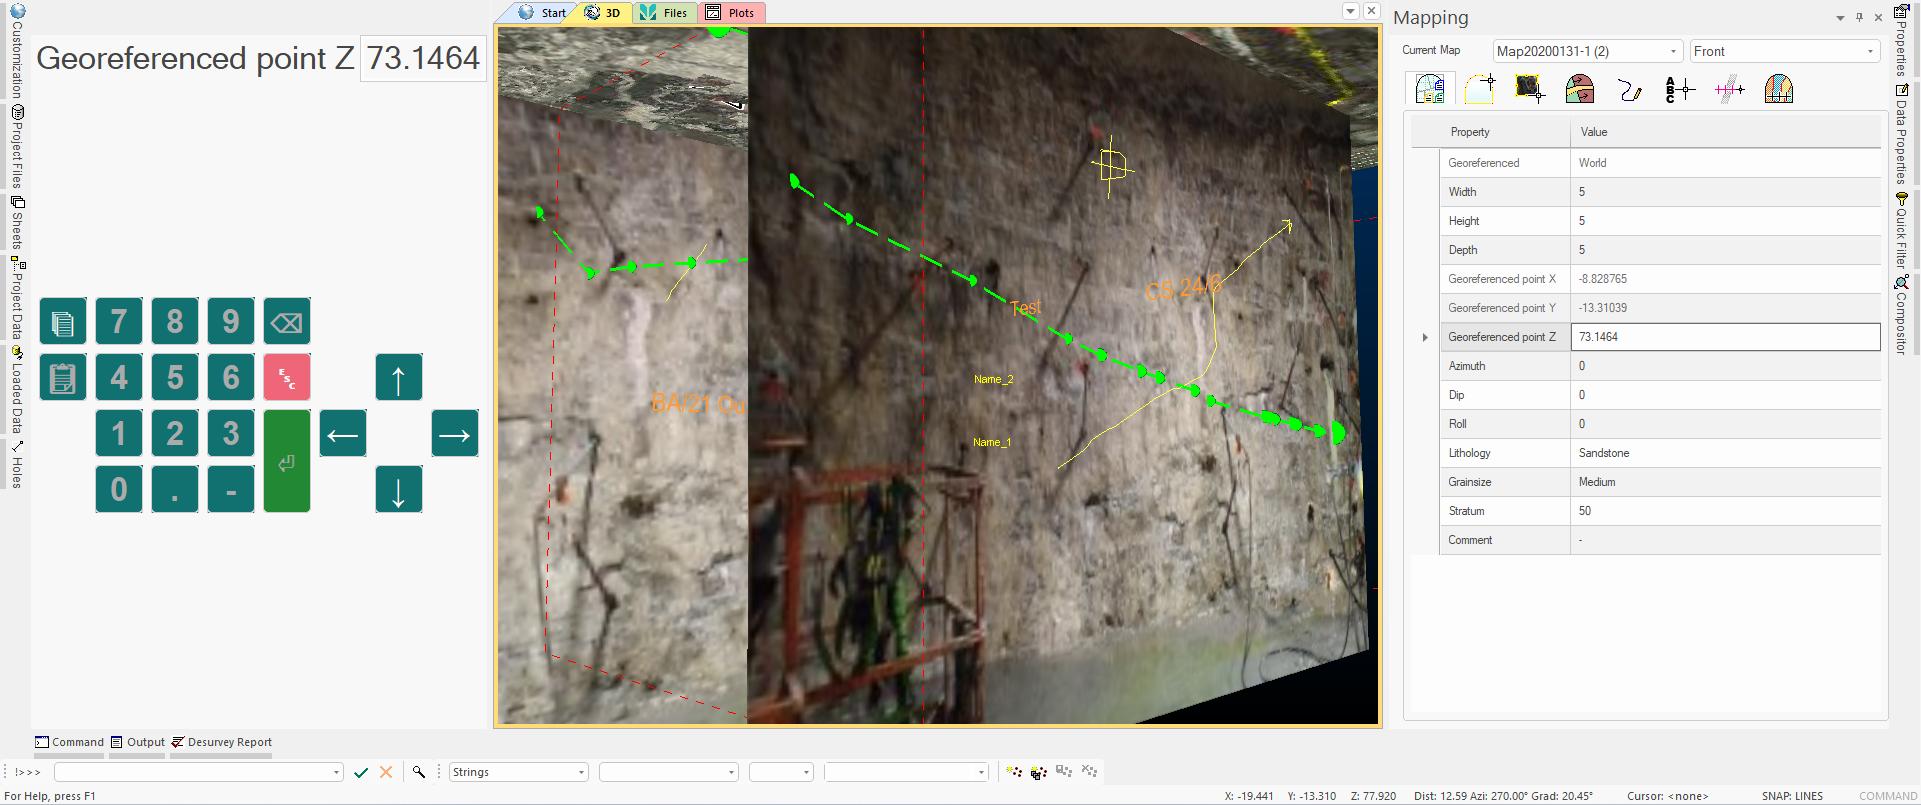
Numeric Data Entry (Whole Numbers)
Where integers are expected, a keyboard like this displays:
This acts just like a virtual numeric keypad, with the addition of Copy and Paste functions on the left. To the right of the numbers, from top to bottom, you'll find a backspace key, an ESC key (dismisses the keyboard) and an ENTER key. Pressing ENTER dismisses the keypad and updates the target field.
All keyboards feature four directional arrows to allow you to change the editable field to a neighbouring one. This can make traversing tabular data easier as the keyboard remains in view but updates to show the newly selected field value.
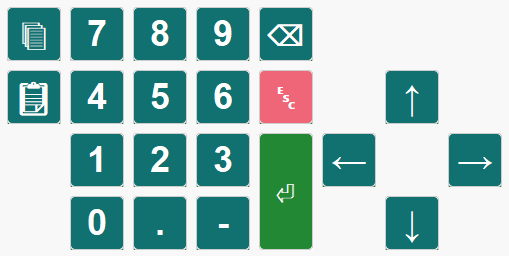
Alphanumeric Data Entry
If a field is selected that accepts alphanumeric data, an alphanumeric keyboard displays that is closer to a physical equivalent:
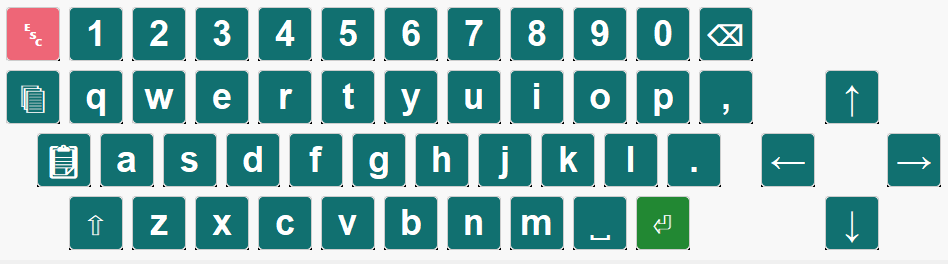
Read-only Data
Selecting a field that contains read-only data displays either a numeric or alphanumeric keypad that is largely inactive, for example:
These keypads allow you to Copy and use the navigational arrow buttons. You can also press ESC to dismiss the keyboard.
Note: a keyboard is not displayed if a field requires data selection from a list. In this case, you will need to select a value using the stylus or physical keyboard as normal.
Related topics and activities