Save and Test Report Template
This is the seventh of a series of activities relating to field map reporting configuration.
Warning: This topic is intended for Studio Mapper system administrators. You should not attempt any of the following procedures unless you are confident to do so, and are familiar with the concepts described.
This topic assumes some familiarity with the Plots window and Plots window templates.
If you have completed the preceding activities, you have updated your system configuration file to reference a Plots window template, and generated a template containing face projects and, optionally, a 3D projection and dynamic table items.
The final step is to export your template so that it can be used by Studio Mapper's automated PDF reporting function.
Warning: updating the system configuration file will affect all Studio Mapper projects with which it is associated. Changes should only be made if you are familiar with the XML format, and changes should be tested in an appropriate environment before rolling out to a live system.
To finalize and export your field mapping report template:
-
Display the plot sheet that represents your report template.
-
Finalize the sheet by adding other plot items. This can include a legend, profile, scale bar and so on. See Plot Item Library.
-
Activate the Manage ribbon.
-
Select Save To >> Template.
-
Browse to your database's Templates folder and Save the template with the same name as you used in your system configuration file. You added this reference during the first activity (Assign Plot Template).
-
Save your project.
To verify that your report output is working as expected:
- Activate the Home ribbon.
-
Select Report >> PDF.
PDF button not enabled? This indicates there is a mismatch between the contents of your system configuration file and the names of .dmtpl files in your Templates folder. Check that the <MapType>...</MapType> references exactly match the names of the template files available.
-
When prompted, enter the name of the PDF file to Save.
-
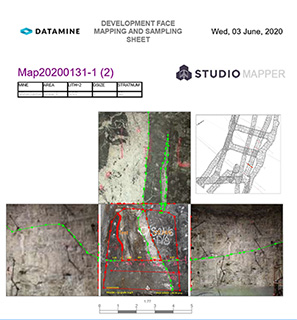
Make sure the output PDF file is as expected, and in particular, check each projection is correctly represented, e.g.:

-
If required, update the central database with the latest configuration file.

