|
|
Pit Design Tutorial - Slopes and Regions Setting up default face angle and berm width parameters for your pit |

Pit Design Tutorial - Define the Default Face Angle and Berm Width
To project a pit from either a pit rim downwards, or a pit base upwards, you need to inform Studio OP as to the desired face angles and berm widths that it needs to honor. These angles are non-negotiable but can be applied in a hierarchical manner (if no value is defined for this bench, check this region/rosette, then check the defaults for the pit).
Studio OP allows you to define pit slopes at the pit (default) level, within regions and/or within specified azimuths and zones of influence as defined by rosettes. How these rosettes influence the surrounding data is managed using the relative power of each rosette.
In this tutorial, a default face angle and berm width will be defined for the pit only. You can find out more about regional slope control and rosettes here.
Prerequisites
-
You have completed Define Model, Benches and DTM.
Exercise: Define Default Face Angle and Berm Width
- Select the Design ribbon.
- Select Define Slopes.
- In the Define
Regions panel, locate the DEFAULT table row:
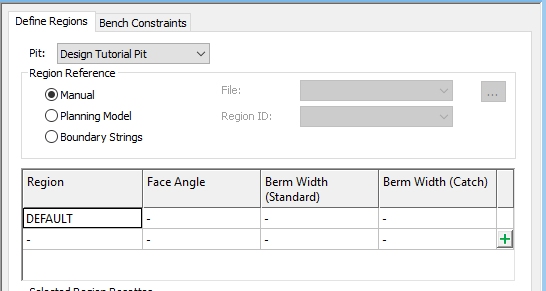
- Enter the following information:
Face Angle: 65
Berm Width (Standard): 35
A catch berm won't be defined for this example. - Save and Close
the task.
")
Slope regions must be defined at the pit (default) level before a pit design can be calculated. If you attempt to access a design task where a pit-level default face angle or berm width has not been defined, you will be notified that the task cannot be performed.