Create Isoshells - Input
To access this screen:
-
Display the Create Isoshellsscreen and select the Input tab.
The Create Isoshells tool allows categorical or continuous isoshells to be created from a point sample input, such as drillholes or chip samples.
Use the Input tab to select a sample file (usually a drillhole or points file) and associated coordinate fields. The field of interest is also defined here as well as isolevel values and the type of isoshells to be generated.
Continuous vs. Categorical Values
The isoshells you produce can contain either Continuous or Categorical values – the type you select determines access to other functions on other screens of the Isoshells console
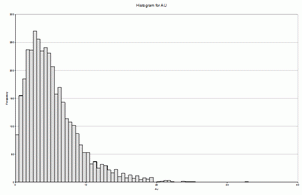
- Continuous - values vary continuously between samples, as illustrated
below, and are assumed to have an infinite number of possible
values - for example, grade. In isoshells created using continuous
values, interpolated values between sample data are created. This
type of value is always numeric:

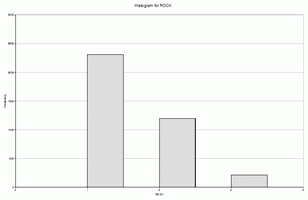
- Categorical - a specific set of values with no numerical
relationship - for example, zone or rock type, as illustrated
below. Samples with a specific target value are used, rather than
interpolated values. This type of value is numeric or alphanumeric:

To define input parameters for isoshell modelling:
-
Specify an input Sample File. This must be of the drillholes or points data type.
The coordinate fields of the input file are detected automatically if possible, otherwise, select the relevant X Field, Y Field and Z Field values from the respective list (all numeric fields are listed).
-
In the Isolevel Values group, pick the Type of isoshells to be generated:
- Continuous—values vary continuously between samples - for example, grade. In isoshells created using continuous values, interpolated values between sample data are created. This type of value is always numeric.
-
Categoricala distinct set of values with no numerical relationship - for example, zone or rock type. Samples with a specific target value are used rather than interpolated values. This type of value is either numeric or alphanumeric.
-
Select the Value field which contains the values being interpreted - depending on the type of isolevel you select, either alphanumeric or numeric fields are displayed.
Note: subsequently changing the isolevel type may result in a different default field being displayed in this drop-down list, if the previous selection was incompatible with the requested type.
-
You can also define an optional Weighting Field which is used for interpolation. This is only available for continuous isolevels.
- Choose your isolevel Values.
- You can either do this individually
or by specifying a range. The value liston the right
shows currently-selected values.
- Add Single Value—enter values individually by entering a Value and pressing -> to transfer the value to the list (which is sorted automatically into increasing alphabetical or numeric order, depending on the Value Field type.
- Add Values from Range—choose a Minimum and Maximum value and a Step. All (inclusive) qualifying values between the lower and upper bounds are transferred to the list on the right with ->.
-
Review the value list. You can delete individual items by highlighting them and pressing DELETE. You can also select multiple items, either concurrently or as separate values, using the SHIFT and CTRL keys respectively.
Note: if you need to define a new range, select Remove All and generate new values.
Related topics and activities

