
VR Object Types Menus
Note: A Datamine eLearning course is available that covers functions described in this topic. Contact your local Datamine office for more details.
The active 3D window folder of the Sheets control bar is used to set view properties for all loaded 3D data, access object-specific properties, and load/unload data from memory.
The VR Object Types folder contains a listing of all unique object types currently associated with the current project. You can apply objects to your scene only when an object type has been defined, but there is no limit (memory notwithstanding) to the number of instances of an object type that can be placed into your scene.
The Object Type is configured for all of the global properties, to be applied to all objects that arise from it, including the maximum and minimum speed, the turning rate and the actual DirectX object to be used in your scene. Once a type of object has been defined, it can be placed in the world (using the context-menu for an object type item), adding another entry to the VR Objects folder. It is important to distinguish between these two folders: VR Object Types lists all unique object types, and VR Objects lists all instances of object types.
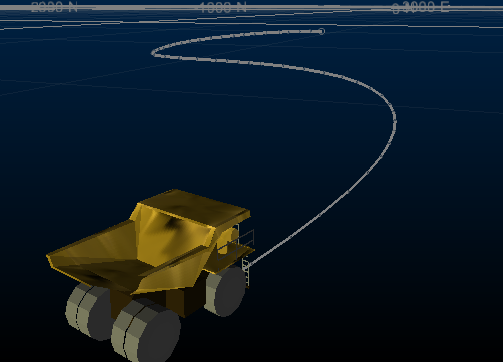
A mobile VR object with an alignment string
Two menu variations exist, depending on where you right-click. Right-clicking a top-level folder displays the Top Level Menu, and right-clicking an item within it shows the Item Context menu:
VR Object Types Menu:
The VR Objects folder contains a list of all object types associated with your project. An Object Type is a category of object in DirectX® format, and are used to represent self-contained 3D objects that can be attached to other components such as alignment strings (see Attaching objects to strings) as part of a simulation.
To add a custom object to this list, use the context menu options as shown below (note that these options are displayed when the Object Types folder is right-clicked. Other options are available for individual items (see further below):
| Load | Display the Data Import screen, used to select a Data Source Driver to import a new VR object type. |
| New | Add a new object to the list, and to the world, with this option. The Object Type Properties screen is displayed, allowing you to set the properties of the new object. |
| Clip All | Apply current view clipping to all overlays of the selected type. See Clipping 3D Data. |
| Clip None | All overlays in the target folder will ignore view clipping settings (show them completely) if selected. |
| Delete All | Remove all loaded VR Object Types. |
VR Object Types Item Menu
Right-clicking an item within the Object Types folder shows the following menu options:
| Rename | Display the Data Import screen, used to select a Data Source Driver to import a new VR object type. |
| Object Type Properties | Display the Object Type Properties screen, used to configure the object type. |
| Copy | Create an identical, automatically named copy of the selected object (note that there is no requirement to paste the item - the list of objects will be updated automatically). |
| Place Objects |
Enables object placement mode. When selected, click in the active 3D window to add an object of the selected type at the location defined. This will add a new entry to the list shown in the VR Objects folder. Each instance of a placed object can be manipulated independently. |
| Delete |
Delete non-system object types. You will be asked to confirm this action. Note: Deleting an object type will also remove all instances of the object from the VR Objects folder and the active 3D window. You cannot undo this operation. |
Related topics and activities