
Date Bar
The date bar accompanies the Task area and provides each activity with a time context.
Changing the date bar
You can change the way that the date bar displays.
The date bar can display up to three tiers. By default:
- The top tier displays the month and the year. This is the automatic setting.
- The middle tier displays the weeks.
- The bottom tier is not displayed.
You can change the date bar. To do this:
- Right-click the date bar. The Timescale screen displays with the Default Timescale selected.
- Do one of the following:
Changing the Default Timescale
To change the default timescale:
- Select the tier that you want to modify.
- Change the values, as required.
- Repeat steps 1 and 2 for the other tiers, if required.
- Click OK.
Create a New Timescale
To create a new Timescale:
-
Click
 (new). an entry called New Time Scale 01 is added under Default, for example:
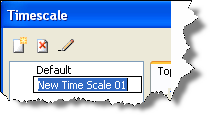
- Overwrite the default name with the name you want, or press Enter to accept the default name.
- Select the tier that you want to modify.
- Change the values, as required.
- Repeat steps 3 and 4 for the other tiers if required.
- Click OK.
Add an Automatic Date Range Filter
You can use the date bar to setup an automatic Date Range filter.
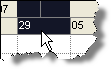
To add an automatic date range filter:
- Click on a date in the date bar.
- Move the cursor slightly to the left or right. The
date cell that you have clicked displays dark gray.
-
Release the cursor. Two things happen:
-
A filter called Date Range is added to the Task Filtering toolbar, like this:

-
The filter is automatically applied to the project.
-
Related topics and activities