|
|
3D Overlay Groups Adding 3D overlays to plot sheets |
3D Plot Overlays
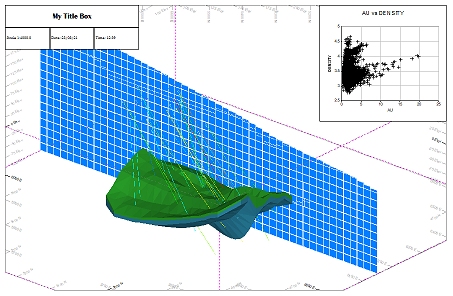
In Plots window sheets, your mining data can be displayed using one or more overlays, which form one aspect of plot projections. Find out more about the view hierarchy in Studio products...
Find out more about projection overlay types...
Overlays represent a view of a loaded data object. This could be a collection of pit strings on a plan projection, for example. There are two distinct modes available to you for displaying plot window projection data:
-
Static/2D projection rendering
This method is the default display mode for static projections and provides lightweight data outlines/indicators. It is, for example, the display method used when generating a plot projection from a 3D window view using the create-plot-view command and selecting the 2D Overlays option. It is also the method used to generate and render overlay plot items added via the Manage ribbon.
These overlays appear directly under the Overlays section of the Sheets (or Project Data) control bar menu system, for example: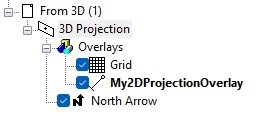
An example of basic-rendered overlays: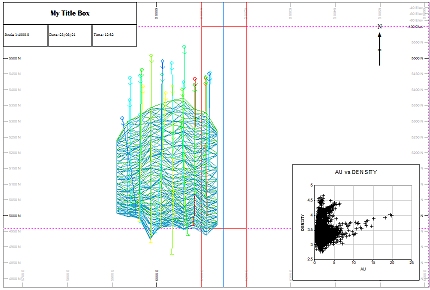
Such overlays can be formatted by double-clicking their respective overlay tree item, displaying the Format Display dialog appropriate for the target data type. -
Dynamic/3D projection rendering
This type of rendering is reserved for 3D overlay types (that is, those stored with a 3D Overlay Group) and will be displayed, in effect, as a replica of the data as it would appear in a 3D window. 3D overlays are added using the Sheets or Project Data control bars, or can be introduced as new plot items.
3D overlays are stored in the same Overlays folder as other plot overlays, in a dedicated 3D Overlay Group sub -folder, e.g.: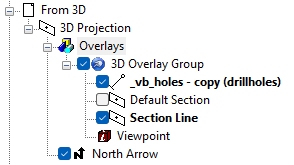
An example of a collection of 3D overlays in a projection: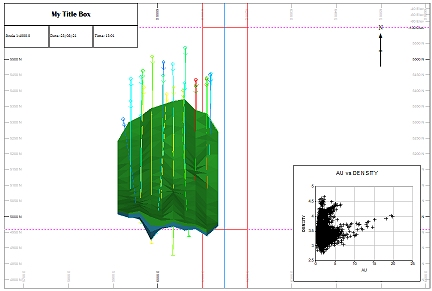
3D overlays can be formatted by right-clicking the appropriate item in the 3D Overlay Group folder and selecting the relevant Properties option. In fact, the right-click menu displayed in this situation is the same as displayed in the Sheets or Project Data bar's 3D folder for the same object overlay.
For more information on a particular properties panel, press <F1> with the relevant panel displayed to show context-sensitive help.

Adding a 3D Overlay Group or 3D Overlay to a Plot Projection
To add a 3D overlay to a plot projection, you will need to load the 3D data object to be rendered, then create a 3D Overlay group, and finally populate that group with one or more overlays:
- Display the plot sheet you intend to modify, using the Plots window.
- In the Sheets or Project Data control bar, expand the Plots folder item
- Locate the plot sheet folder and expand it to reveal the projections.
- Expand the appropriate projection to display the Overlays folder.
- Expand the Overlays folder.
- If a 3D Overlays Group item does not appear in the list of available overlays, right-click the Overlays folder item and select Insert.... If a 3D Overlays item already appears, you can skip to step (9)
- Select 3D Overlay
Group from the Plot Item Library
and click OK.

A 3D overlay can only be inserted if the Plot Item Library was opened using the Overlays level of the Sheets or Project Data Bar menu. This is because a 3D overlay is a 'child' of an Overlays collection 'parent'.
- Expand the Overlays menu folder and right-click the 3D Overlays folder and select Create from Loaded Data...
- Select the loaded data object(s) to be rendered within the selected projection.
- Click OK to render the object(s) using their default 3D window formatting options, which can be .set using 3D display templates
- Format the rendered 3D objects using their respective Properties dialog, displayed by right-clicking the overlay name that has appeared in the 3D Overlays collection.
Edit the Resolution of a 3D Overlay Group
The following procedure lets you change the resolution of all 3D Overlays in a collection. If you want to render mixed resolution 3D overlays on a plot, you will need to create a new 3D Overlays group first.
|
|
If your plot sheet contains multiple 3D Overlay groups, you can right-click any of the folders labelled "3D Overlay" and Rename it. |
- Using the Sheets or Project Data control bar, expand the Plots folder to display a list of plot sheets.
- Expand the plot sheet item containing the 3D overlay group to be edited
- Expand the Overlays folder and right-click the 3D Overlay Group icon.
- The Format Display dialog will be displayed, open at the 3D Overlay Properties tab.
- Edit the resolution value to the pixels-per-inch required and click OK.
Deleting a 3D Overlay from a 3D Overlay Group
- Using the Sheets or Project Data control bar, expand the Plots folder to display a list of plot sheets.
- Expand the plot sheet item containing the 3D overlay to be deleted
- Expand the Overlays | 3D Overlay Group folder.
- Right-click the 3D Overlay you wish to delete and select Delete [Object Name]
Refresh and Reload 3D Overlay Data
- Expand the Sheets or Project Data control bar folder system for the Plot sheet containing the 3D Overlay to be updated.
- Expand the Overlays | 3D Overlay Group folder.
- Right-click the target 3D Overlay and select Data | Reload (more...) or Data | Refresh (more...).
|
|
Related Topics |
|
|
View hierarchycreate-plot-viewAbout the 3D WindowThe 3D (Sheets) FolderDesign and Visualization3D Window Templates |

