|
|
Sequence the stockpile model |
Stockpile Sequencing
To access this dialog use one of the following:
The Stockpile Sequencing dialog is used to select a set of stockpile evaluation data and generate a stockpile block sequence.
|
|
The Stockpile Evaluation dialog first needs to be used, to generate the data required as input into this stockpile sequencing process. The stockpile sequencing dialog is very similar to the dump sequencing dialog but has the following differences:
|
Field Details:
The following fields are available in this dialog:
Stockpile Data:
Definition: select a stockpile definition from the dropdown.
Wireframe: select a stockpile wireframe from the dropdown.
Outlines: select the stockpile block outlines from the dropdown.
Filter by Lift: select a lift number from the dropdown.
|
|
The filters are typically used when sequencing the blocks in the various lifts, in the Build Sequence and Reclaim Sequence tabs. |
Lift Entry Blocks:
Lift Block grid: lists the Lift and Block values for the currently loaded Stockpile Data.
|
|
The Lift Entry Blocks are those stockpile block outlines which define the entry point for a specific stockpile lift; each lift is allowed only one entry block. When the unsequenced data are first loaded, the Block values are absent and the Lift values are displayed in red. These then change to black once the lift entry blocks have been defined. |
Pick: select blocks interactively from the 3D window.
Build SequenceandReclaim Sequence tabs:
These tabs are only available after all lift entry blocks have been defined; each lift requires a lift entry block. |
Dependencies:
Dependency Table: optionally select a dependency table from the dropdown.
New: create a new dependency table.
Dump Dependency grid:
Leader: first block in a dependency.
Follower: second block in a dependency.
Add: add a new dependency to the grid and define Leader and Follower parameters.
Auto: optionally, automatically generate dependencies for the filtered blocks.
This is used to optionally generate a set of dependencies which can be customized and then used to enhance or replace the sequence which is generated when the Sequence button is pressed. |
From String: define dependencies by selecting a sequence indicator string(s) in the 3D window.
Remove: delete the selected dependency from the grid.
Remove All: delete all dependency entries from the grid.
Sequencing:
EFH: enter a value for the effective flat haul factor.
Nearest First: select this option so that the sequence always tries to find the next available Block that is nearest to the Lift Entry Point.
Furthest First: select this option so that the sequence always tries to find the next available Block that is furthest from the Lift Entry.
These controls can be used in conjunction with the Build sequence to mimic a First In First Out (FIFO) or Last In First Out (LIFO) sequence for Reclaim. |
Sequence: click this to sequence the stockpile blocks using the parameters defined in this dialog.
Animate: animate the stockpile block sequence and display it in the VR window.
Use this to visually check the build and reclaim sequences. Modify any of the above parameters as required and rerun the animation check. |
Stockpile Sequencing
The Stockpile Data files are generated by running the functionality displayed in the Stockpile Evaluation dialog. The Stockpile Definition file initially holds the BlockID (column DUMPBLID), volume (column VOLUME) and lift number (column LIFT) of each stockpile block. After sequencing the stockpile blocks, the dump block sequence numbers (columns DUMPSEQ, BLDSEQ, RECSEQ ) are added to this file.
A lift entry can be selected for each lift by picking a dump block. An icon of a truck is shown to signify that this is the lift entry. Only one lift entry is allowed per lift. A lift entry can be deleted by selecting the row in the grid and pressing delete.
Using the Sequencer
The EFH Factor (effective flat haul factor) is used to factor the distance between lift entry blocks on adjacent lifts. This compensates for the slower speed on a ramp and will mean that although a block on the lift above may be the next nearest block, the actual cycle time is longer and dumping should in fact continue on the current lift.
The Sequence button is used to calculate the dump block sequence number for each block based on a dumping sequence that minimises the haul distance. The dump block sequence number is then stored in the definition table.
Once the blocks have been successfully sequenced, the dump sequence can be viewed in the VR window by clicking Start Animation. The animation is launched automatically and the view is centred on the current dump wireframe.
The build and reclaim sequence is driven by a combination of the Lift Entry point, Effective Flat Haul Distance and NF/FF logic. It is best to experiment with these settings to get the desired result. |

Defining Lift Entry Blocks
In the Stockpile Sequencing dialog, Stockpile Data group, set any required filters,
In the Stockpile Sequencing dialog, Lift Entry Blocks group, click Pick...,
In the Design window, select each lift's entry block (outline or point),
In the Pick Lift Entry dialog, click Finished,
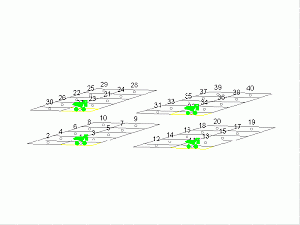
In the Design window, check that the correct blocks have been selected; those that are the designated lift entry blocks are annotated with a green dump truck symbol.

Repeat steps 1 to 5 until all lift entry blocks have been defined.
Rerun steps 1 to 5 in order to reselect any incorrectly-assigned lift entry blocks. |
|
| Related Topics |
|


