
Import Geographic Vector File
The Import Geographic Vector File is reachable by clicking ![]() Add a Geographic Vector File in the Map Window Tool Bar. It enables you to import vector map files. If your vector file contains several layers, they can simulaneously be imported in Isatis.neo thanks to the import task. The different layers will be then brought together in a same layer
Add a Geographic Vector File in the Map Window Tool Bar. It enables you to import vector map files. If your vector file contains several layers, they can simulaneously be imported in Isatis.neo thanks to the import task. The different layers will be then brought together in a same layer ![]() in the
Layers List of the Map Window.
in the
Layers List of the Map Window.
The procedure is divided into 3 steps:
Input File
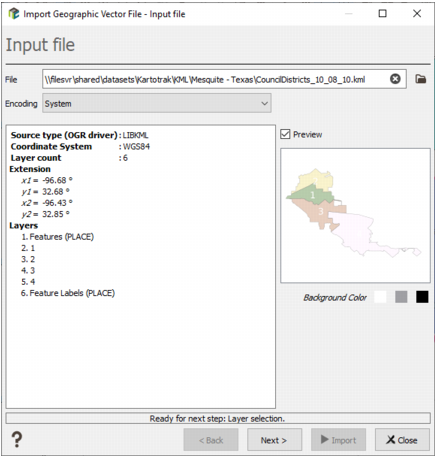
- File: Select the input file, click the folder icon to pop up a window file selector.
- Encoding: The option is reserved for advanced users. Select here the codec in which the file is coded. The default codec system works in most of the cases.
- Use the Preview option to display a preview of the file. This step can be a little bit slow depending of the file size, so by default the option is not activated. Three colored buttons (white, grey and black) allow to change the background color of the preview. It can be useful to visualize white text for example.
- Some information is displayed next to the preview: the file format, the coordinate system, the number of layers, the file extension and the list of all the layers contained in the file.
Note: If the following message "Selected file cannot be imported" appears in the back of the panel, it means that the format of the input file is not supported by the Isatis.neo import. In this case, please contact our support team.
Layer Selection
If the input file contains only one layer, this step is skipped.
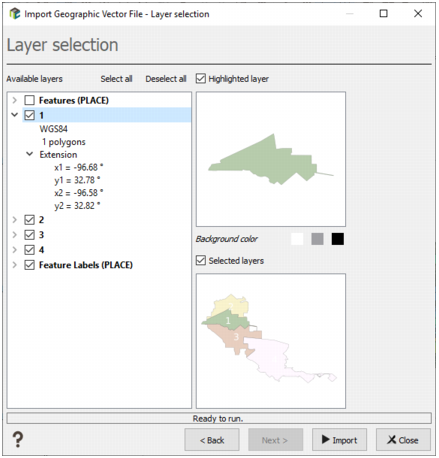
- Select in the Available Layers list the different layers that you want to import in Isatis.neo. For each layer, you can see attached information: the coordinate system, the geometry of the layer (point, line or polygon) and the layer extension.
- Click Select All to select all the layers.
- Click Deselect All to deselect all the layers.
- Click Highlighted Layer to display the current layer. Three colored buttons (white, grey and black) allow to change the background color of the preview. It can be useful to visualize white text for example.
- Click Selected Layers to display all the selected layers.
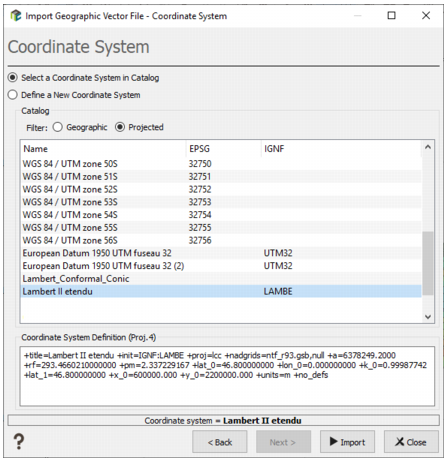
Coordinate System
If the coordinate system is defined by the input file or by a *.prj file for example, this step is skipped.
-
Select in the catalog the coordinate system of your input vector file. The most common coordinate systems are preselected. If the system you are looking for is not in this list, click Define a New Coordinate System. For more information about how to define a coordinate system, please refer to the Coordinate System Selector section.
Note: If you have defined a coordinate system that differs from the system selected at the study creation, the imported file will be automatically reprojected by Isatis.neo.
- Click Import to end the import task.
- Press Close to abort the import task.
Note: Since the external file can be very memory consuming, the external file won’t be copied into the project’s folder. This implies that if you move or delete the external file the map will disappear from your project. To avoid that, we advise to put your vector file in the public folder of the project. In this way, it will automatically be integrated when you will do a backup of the project. If it is located outside the project folder, we will offer the possibility to copy the file when making the backup.