
Projects
The Projects section presents the list of Isatis.neo projects. Only the projects that has been created from the actual computer are listed here. If you want to add an existing project to this list you need to Restore it from a backup or to Attach it (see below for more details about the two commands).
-
The projects are displayed with a dedicated icon.
-
 corresponding to the valid projects.
 - This decoration
 means that the data base of the project is not compatible with the version of Isatis.neo you are using (it comes from an older version) and the project needs to be upgraded in the current version of Isatis.neo.
 - This decoration
 means that the data base of the project is corrupted or the project is not reachable anymore (it has been deleted, renamed or moved outside Isatis.neo). The detail is displayed in the information area.
 -
 meaning that the data base of the project is located on the network.
Note: Isatis.neo projects will always be compatible with the next version, that is to say projects realized with Isatis.neo v2019 will be compatible with Isatis.neo v2020. However the projects realized with Isatis.neo v2020 might not be compatible with Isatis.neo v2019.
-
-
Here is the list of the available commands:
-
 Click Refresh to update the projects list.
 -
 Select a project and click Close to close the project. This action is only available through a right click or from the ribbon (Home section) when you are in a project. Close a project is required to duplicate, move, rename, change coordinate system, backup or delete the project. It can also be done using the keyboard shortcut Ctrl+w.
 -
 Click Create a new project to create a new project inside Isatis.neo. The following window pops up. The window allows you to specify a Name for the new project, to set the Location on the hard drive and the Coordinate System.
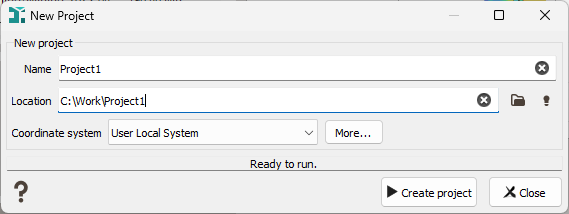
- Name: Enter the name of the project. A physical path will be attached to your project for that purpose (see below).
- Location: You see here the physical directory on which the project will be found. By default, the project is saved in the default location (generally C:/Isatis.neo/Projects). Click on the folder icon to modify and select your own location.
- Coordinate System: Select a specific projection in the list or click More to open the Coordinate System Selector window. If needed you can select User Local System which means the coordinates won’t be projected.
Note: To see more about projections, go to Projections and Geo-reference Systems.
-
 Select a sproject and click Open the selected project to load an existing project into Isatis.neo. It becomes the current project. Remember that each project has its own preferences which are read when set on. So changing the project modifies the Setting up Preferences.
 -
 Select one project in the list and click Duplicate project to make a copy of the selected project. A window asking the name of the duplicated project will pop up. By default, the same name and the same path (i.e. the physical directory on the machine where the project is saved) as the original project followed by "(2)" are defined. This action requires the project closure.
 -
 Select one or several projects in the list and click Move selected projects to modify the project directory location. Specify the new Destination by clicking on
  to open an explorer. This action requires the project closure.
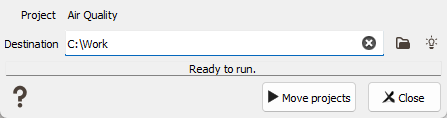
-
 Select a project in the list and click Rename the Selected Project to rename the project. This action requires the project closure.
Note: Some characters are forbidden in the project name, you cannot use special characters such as: %, ù, £, $.
-
Click
 to Change the Coordinate System of the selected project. This can be useful in different cases:
- Case 1: No coordinate system has been chosen at the project creation (User Local System). Now you know the correct coordinate system and you want to set it.
- Case 2: The coordinate system chosen at the project creation is wrong, you know the correct coordinate system and you want to fix it.
- Case 3: The coordinate system chosen at the project creation is wrong, but you do not know the correct coordinate system. You want to set the coordinate system to User Local System.
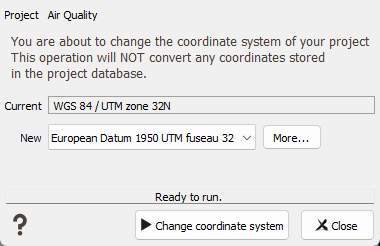
Clicking on Change the Coordinate System of the selected project pops up a sub-window which refers the current coordinate system and which proposes a list to select the new coordinate system in which you want to set your project. If the coordinate system is not in the list, click More to open the Coordinate System Selector window.
This action requires the project closure.
Note: To see more about projections, go to Projections and Geo-reference Systems.
This new coordinate system modification should be restricted to some configurations:
- Changing to a coordinate system is correct only if all data already loaded in the database have coordinates actually expressed in the same system. You must be aware of this.
- Changing to "User Local System" is always correct. However, you must be aware that imported data and geographic files, used as background in the Map, must be in the same User Local System, since no conversion will be possible.
-
Select one or several projects in the list and click Convert the selected projects. The selected project(s) will automatically be converted at the same time, from a previous version of Isatis.neo to the new one.
-
 Click Attach an existing project to load an existing project which is not present in the list. This functionality allows to specify the physical path of the project in your file system. It is mainly used when a project has been moved on the disk since its creation and cannot be found anymore by Isatis.neo.
 -
 Click Restore a project to restore the contents of a project into a new one from a backup file (previously created with the Backup the selected project command).
 -
 Select aproject and click Backup the selected project to save its contents in an external backup file. The project is not deleted. This file can be used to transfer data from one account to another, or from one system to another or to temporarily save disk space.
 This action requires the project closure. When you backup a project, all the objects contained in the project database are saved by default. They are grouped by type: Data, Geostatistical sets, Chart files, Scenes, Neighborhoods, External files, Public folder content, Report content, Batch files, Python modules. The associated size (on disk) is displayed to see which object types take up a lot of space. You can tick/untick the ones you decide to include in or / remove from the backup file and save space. Public, Report and Batch folders offer click-able links to directly open the corresponding explorer and see their content. Click on the Customize button to define precisely for each object type, through explorers, the objects you want to consider or not in your backup file.
Note: If you have previously created units, these ones will be automatically included in the backup file and restored. Preferences will be kept too.

-
 Select one or several projects in the list and click Delete selected projects to delete the selected project(s). A popup window asks you to choose between Detach and Delete.
 -
 The first Detach action consists in unloading existing project(s) from Isatis.neo. The project will remain on your disk (the physical project is not deleted) but its name will no longer appear in the list of available projects. Then you can use the button Attach an existing project to see again the project in the list.
 - If you want to delete the project and its contents, use the Delete from disk action. Once the project is deleted, there is no "undo" capabilities. This action requires the project closure.

-
-
 /
/  Use these two buttons to switch between the list view and the icon view. When displaying in list view, the dates of creation and last opening, as well as the physical path are also informed. You can click on the column header to order your projects (by alphabetical order clicking on Project or highlighting the recent projects by clicking on Creation date for example).
-
-
A
 Tutorials section shows the tutorials available in the installation of the application.
-
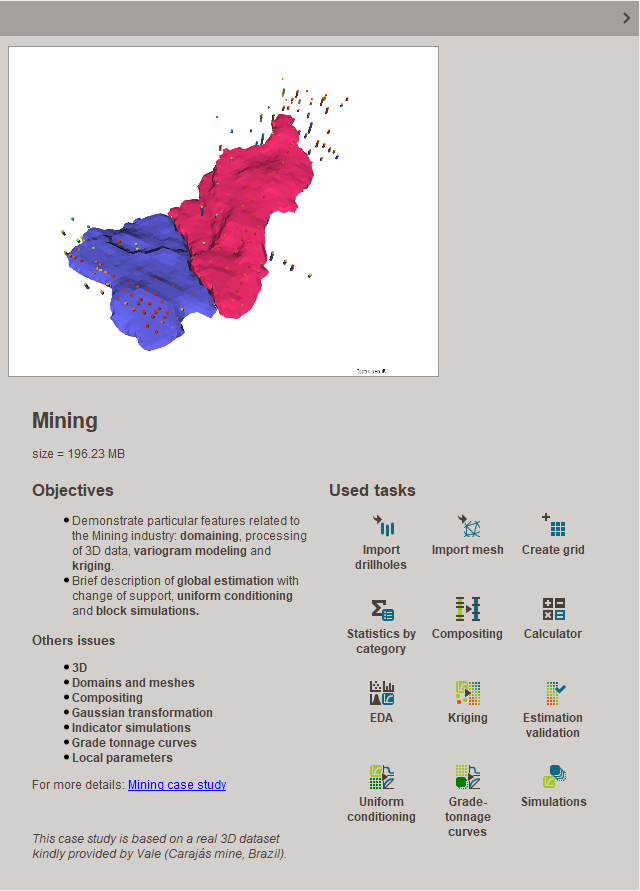
Select one of these tutorials to see information about the tutorial content on the right part of the Project manager (illustration, size, main objectives of the tutorial, a link to the online documentation to access more details, dataset information, main used tasks). For space saving, this section can be hidden by clicking on
 .
.
- The double click will create a new project from the backup file, then the new projects become the selected projects.
-
Select one tutorial and click
Restore a tutorial project or directly double click on the tutorial to restore it. Define a Name (the same as the one defined in the list by default). Click on the directory icon if you want to modify the default Location. It opens a file explorer. Define the physical path where you want to store your Isatis.neo tutorial. Finally click on Add tutorial.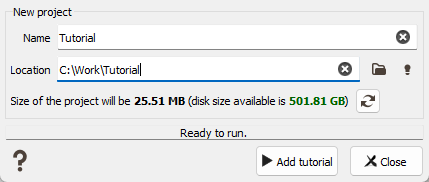
-
Some useful keyboard shortcuts:
- Ctrl + N to create a new project.
- Enter (or Return) to open the selected project.
- Ctrl + W to close the selected project.
- Ctrl + A to select all.
- Ctrl + click to select several items.
- Shift + click to select all the items included between the two clicked ones.