
Stereonet Charts
To access this screen:
-
Display the Stereonet screen and select the Charts tab.
The Charts tab of the Stereonet screen is used to show or hide poles, planes, contours, and a colour map.
You can also define projection, net type, hemisphere, grid, and colour settings for the stereonet plot.
Activity Steps:
-
Use the chart arrow buttons to manage the listed stereonet charts if any are already displayed, otherwise, skip this step.
-
Click Move Record Up or Move Record Down to change the order of the listed charts.
-
Click Select Previous or Select Next to select another chart in the list.
-
Click Delete Selected Chart to delete the selected chart.
-
-
In the Stereonet pane, select the stereonet chart to configure.
The Stereonet pane displays the stereonet charts generated on the previous tab.
-
Review the Display controls.
The Display controls apply only to the chart selected in the Stereonet pane.
-
In Show/Hide, select whether to display stereonet elements:
-
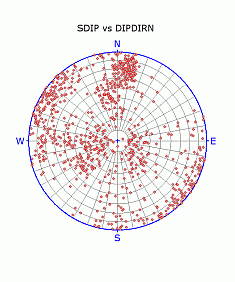
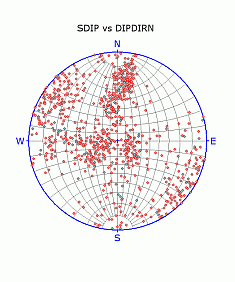
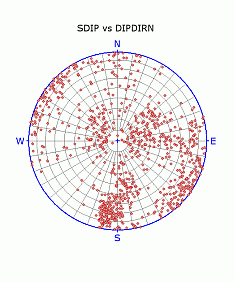
Select Poles to display structure points as poles on the stereonet. Default: selected.
-
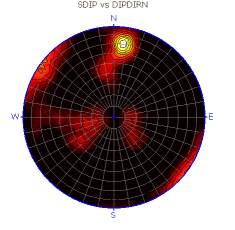
Select Contours to display stereonet contours. Contours are typically used with an equal-area projection.
-
Select Planes to display structure points as planes, or great circles, on the stereonet.
-
Select Title to display the stereonet title.
-
Select Color Map to display a colour map of pole density.
-
-
Select the required colour map type from the Color Map Type list.
-
In Projection, select the projection type:
-
Select Equal Area to display an equal-area, or Schmidt, projection of the data. Use this projection when solving angular relationships and statistically evaluating orientation data using contours. Default: selected. See Schmidt Projection.
-
Select Equal Angle to display an equal-angle, or Wulff, projection of the data. Use this projection when solving angular relationships. See Wulff Projection.
Equal-area and equal-angle projections:

-
-
In Net, select the stereonet type:
-
Select Polar to display a polar projection. Default: selected.
-
Select Equatorial to display an equatorial projection.
Equal-area polar and equatorial projections:
-
-
In Hemisphere, select the hemisphere type:
-
Select Lower to display a lower hemisphere projection. This is the most commonly used projection for structural data. Default: selected.
-
Select Upper to display an upper hemisphere projection.
Equal-area, polar, lower and upper hemisphere projections:
-
-
In Grid, select whether to display grid labels and guides:
-
Select NSEW to label the stereonet with the four cardinal directions. Default: selected.
-
Select Center Cross to display a blue centre cross. Default: selected.
-
Select Outer Circle to display the blue outer circle. Default: selected.
-
Select Cross Hairs to display blue north-south and east-west lines.
-
-
In Colors, select stereonet colours:
-
Select Background to set the stereonet plot background colour.
-
Select Net to set the stereonet grid line colour. Default: grey.
-
Select Grid to set the colour for NSEW, Center Cross, Outer Circle, and Cross Hairs. Default: blue.
-
Note: The Stereonet screen is modeless. You can leave it open while you run commands in 3D and other windows.
Related topics and activities: