
Stereonet Planes
To access this screen:
-
Display the Stereonet screen and select the Planes tab.
The Planes tab of the Stereonet screen is used to create and delete fixed planes, and to define fixed plane and daylight envelope settings for the stereonet plot.
To define a fixed plane:
-
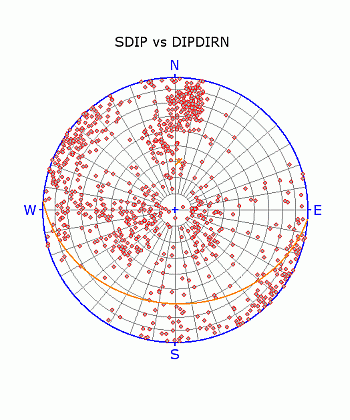
Load the required data and define a stereonet chart.
-
Select whether to show all fixed planes.
Select Show All to display all listed fixed planes. Default: selected.
-
To create a fixed plane, click Create New Plane.
The New Fixed Plane screen displays.
Note: To remove a fixed plane, select the fixed plane in the list and click Delete Set.
-
In the Planes list, select the fixed plane to configure.
The display settings apply only to the selected fixed plane.
-
Enter the fixed plane Name.
-
Enter the fixed plane Dip.
-
Enter the fixed plane Dip Direction.
-
In Display, define the fixed plane and daylight envelope settings.
-
Select Plane to display the fixed plane. Default: selected.
-
Select Pole to display the fixed plane pole. Default: selected.
-
Select Daylight Envelope to display the daylight envelope of the fixed plane.
-
Select the fixed plane Color. Default: orange.
-
Select the fixed plane Line Thickness. Default: 2.
-
Select the fixed plane pole Symbol. Default: X.
-
Select the fixed plane pole Symbol Size. Default: 10.
-
Click OK.
The fixed plane is added to the stereonet chart. Check the fixed plane orientation in the Preview Pane.
Note: The Stereonet dialog is modeless. You can leave it open while you run commands in other windows, such as the 3D window.
Related topics and activities: