|
|
Generating a Pit DTM Generating a pit DTM |

Overview
In this part of the tutorial you are going to create a DTM wireframe model from a set of untrimmed open pit design strings.
Prerequisites
Required:
-
Created a new project and added all the required tutorial files i.e. the exercises on the Creating a New Project page.
Recommended:
-
Specified project and mine design settings i.e. the exercises on the Specifying Design Settings page.
Files required for the exercises on this page:
-
_vb_trc_pit240
Link to Exercises
The following exercises are available on this page:
Exercise: Generating a DTM of the Pit Design
In this exercise you are going to generate a wireframe surface, using DTM methods, for the untrimmed open pit design strings _vb_trc_pit240. This includes the following tasks:
-
Defining data and view settings
-
Generating the DTM
-
Saving the DTM to a Datamine file.
Defining Data and View Settings
-
Select the Design window.
-
Select the Project Files control bar, Strings folder.
-
Select, drag-and-drop the following files into the Design window:
-
_vb_trc_pit240
-
-
In the Sheets control bar, Design Overlays folder, select only the following overlays (i.e. display these overlays):
-
Default Grid
-
_vb_trc_pit240 (strings).
-
-
In the View Control toolbar, click Zoom All Data.
-
In the View Control toolbar, click View Settings.
-
In the View Settings dialog, define the Section Orientation and Mid-Point XYZ coordinate (6040, 5040, 100) and other parameters shown below, click OK:
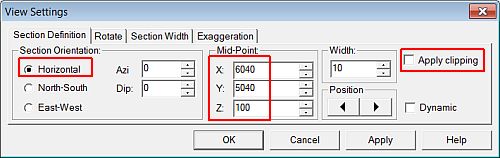
-
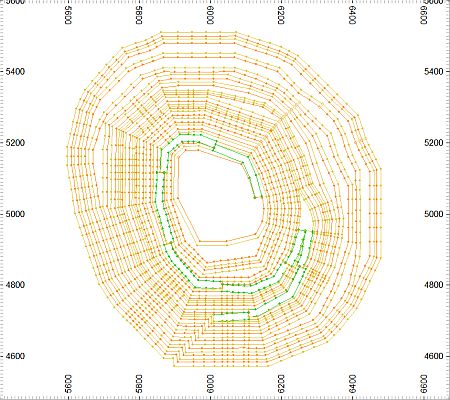
In the Design window, check that your view is as shown below:
Generating the DTM
-
In the DTM Creation toolbar, click Create DTM.
-
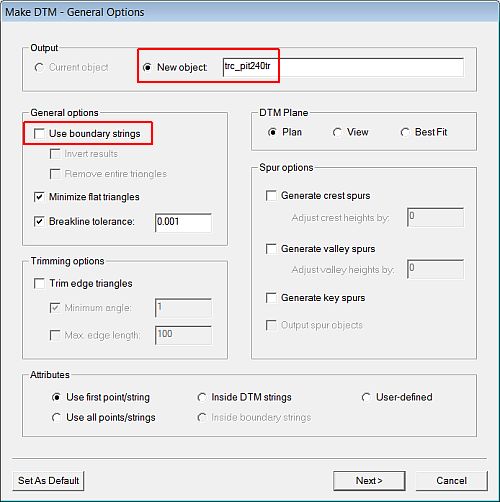
In the Make DTM - General Options dialog, Output group, select the New Objectoption, enter the name 'trc_pit240tr'.
-
In theGeneral Optionsgroup, clear theUse boundary stringsoption, clickNext>:
-
In theMake DTM - Select DTM Points and Strings dialog, Objects group, select only [ _vb_trc_pit240 (strings)], clickFinish.
-
In the Loaded Data control bar, check that the new trc_pit240tr object is listed.
-
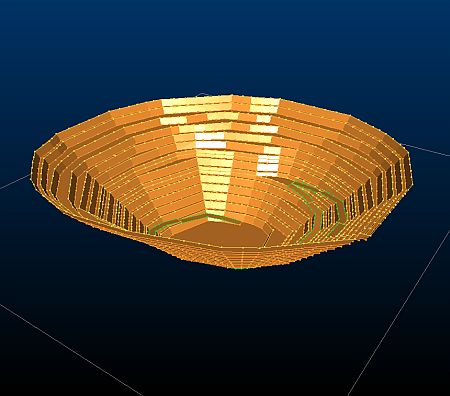
Select Format | VR View | Update VR Objects (vro).
-
In the VR window, rotate the view and check that the pit DTM surface correctly follows the pit design strings as shown below:
Saving the DTM to a Datamine File
-
In the Loaded Data control bar, right-click on the trc_pit240tr object, select Data | Save As.
- In the Save New 3D Object dialog, click Single Precision Datamine (.dm) File.
-
In the Save New Strings dialog, select the path to you tutorial folder, define the File name: as 'trc_pit240tr.dm', click Save.
- In the Loaded Data control bar, check that the trc_pit240tr object has been replaced by trc_pit240tr/trc_pit240pt(wireframe).
-
Select File | Save.
Copyright © CAE Inc.
MIN 20048_00_EN