
Validate Planning Data
To access this screen:
-
Using the Planning ribbon, click Validation.
Warning: Any filtering applied to the primary 3D window data should be removed before validating design data.
It is important your design data does not contain errors prior to processing.
Your application contains a range of validation options that allow you to check your FXS, Outline and Complex Solid design data before you commit it for processing.
The actual checks that can be made will depend on the design type in question. For example, duplicate string data (and duplicate edge data within strings) is checked (for any design type other than wireframes). It is important that duplicate data does not exist to avoid the creation of invalid activities later on. Data is also checked to ensure it doesn't contravene other specified constraints, such as a minimum string edge length, and is also validated to ensure string data doesn't cross over, which is rarely desirable with design string data.
See a list of possible validation checks...
Design data is automatically loaded when the Validation screen is displayed.
This screen is split into two panels:
- Process: Shown by default, this is where you start the validation routine, using Go. During validation, if enabled, progress messages are displayed (as each data item is processed). Errors, warnings and messages are also listed. You can filter the view to show messages of a particular type.
-
Results: This screen lists errors detected during validation and progress updates. Messages for each error type are listed on their own tab.
Validation Options
Validation is performed according to your validation options. These are specific to a project, and are access using the Validation options cog button.
Validation Error Types
Data that may be problematic during processing or other downstream processes are highlighted during validation.
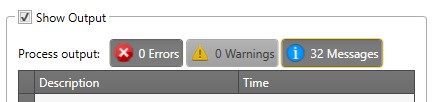
Validation will display information in up to three information categories in the Process output table:
- Errors: Data problems that will invariably prevent processing from completing, or are highly likely to produce unreliable or unexpected processing results. You should investigate and resolve all of these errors before you update your design data for subsequent processes.
- Warnings: Where unusual or potentially problematic data is detected, it is considered a warning. Warnings may or may not need attention but should be reviewed before you continue.
- Messages: Benign status messages indicating the progress of validation.
Use the toggle buttons provided to filter validation output information. For example, if you're only interested in Errors, toggle off Warnings and Messages.
Resolving Validation Errors
Once validation is complete, a results table is produced on the Results panel.
Error messages are categorized by type using independent tabs.
For example, if data errors were found that related to design strings being shorter than the minimum edge length (an "Edge Length" error) and, separately, string data is found to be crossing over (a "Cross Over" error), the following tabs are shown on the Results panel:
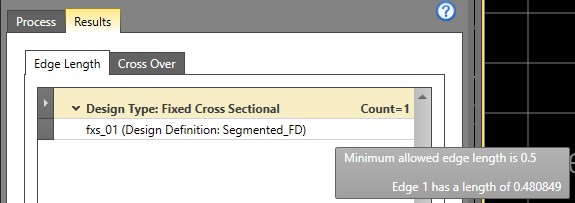
Expanding an Error Type section shows a list of data that may require attention. You can hover your mouse over any entry to display more details of the validation failure, as shown in the example above.
How you resolve these errors will depend on your planning requirements, but could involve resolving the underlying design data (e.g. to remove severe angle changes through string conditioning, for example) or by relaxing validation rules (e.g. increasing the maximum permissible dip for horizontal strings, for example).
Resolving reported issues isn't mandatory (you can continue to commit your current data to processing and scheduling without fixing all or any of the reported items) but it is highly recommended that each failure is investigated before you continue to avoid inaccurate solids modelling and scheduling later on.
How Problematic Strings are Reported
Where duplicate string data is detected, these are generally highlighted as errors (see "Validation error types", above).
Strings that are "fully duplicated", that is, they are in the same design string object and have identical planning parameters, they will be removed, leaving a single unique string entity for processing.
In this case, the validation message indicating string deletion is shown in grey.
If otherwise problematic string data has been automatically edit to remove a conflict, the result will be shown in bold and italic font.
Details will be provided where possible to indicate whether an error has been resolved by data editing or data removal, showing either "Resolved" or "Deleted" in the validation report.
Highlighting Problematic Design Data
Sometimes, you can get a good idea of the cause of a validation error just by viewing the offending design data in the 3D window. To make things clearer, you can filter or zoom (or both) the view to isolate the problematic design data, making it easier to resolve matters, if required.
To highlight problematic data in the 3D window:
- Enable the Process panel.
- Define validation settings. See Validation Options.
-
Select Go to start data validation.
Progress messages display, along with any messages, errors or warnings. See "Validation Error Types".
- Check Show Output.
- If tabs are shown, problematic data has been found. Each tab is labelled with the error type, for example Edge Length or Cross Over.
- Activate the tab that represents the problem you wish to investigate.
- Check Highlight selected item in the 3D window.
- Choose how the view should be updated for each error condition:
- To filter all data from view (hide it) when one or more error items are selected in the table above, choose Filter.
- To highlight the data corresponding to the selected error item(s), without filtering any 3D window data, choose Selection.
- Choose whether the 3D view is zoomed to the extents of data containing errors, using Zoom to selected item:
- If checked, selecting data in the table above does not alter the current zoom factor of the primary 3D window.
- If unchecked, selecting data automatically zooms the 3D view to the extents of all data with errors.
Related Topics and Activities