
Edit Naming Conventions
To access this screen:
-
Planning ribbon >> Project >> Settings >> Naming Convention Assignments >> Edit Naming Conventions.
-
Display the Project Settings toolbar and select Edit Naming Conventions.
Naming Convention Assignments options are used to modify the attributes, properties and names associated with project data; this enables your product to be tailored to the individual requirements of your underground planning campaigns.
These conventions are used to name the activities that result from processing and segment solids. Each activity point has a name, and this name should be recognizable in your output report and schedule, and particularly so when refining and finalizing your schedule using Datamine Task Scheduler.
An example of activity names in Datamine Task Scheduler
Once defined, naming conventions are selectable on the Project Settings panel.
Note: This screen includes table grids that support multiple row selection.
Managing Conventions
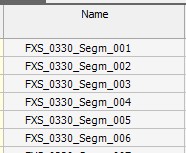
Existing conventions are listed on the left under the Name column. This area is used to select a convention, which will automatically update the contents of the table on the right to show the convention details.
You can use the following buttons to manage your conventions:
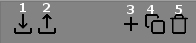
- Import an XML file containing convention information.
- Export an XML file containing convention information. This can be useful for standardizing on naming conventions throughout an organization.
- Add a new, empty, naming convention
- Copy the currently selected naming convention.
- Delete a naming convention. Note that this is only possible if the naming convention has not already been subject to processing. Once processed, a convention is locked.
Conventions can be created based around an Attribute value, the current Project Nameor freeform Text. Each of these elements can be further modified using the parameters in the conventions table. You can includes as many naming elements in a convention as you need.
The order of entries in the naming convention details table on the right can be easily modified with the use of the arrow buttons on the right of the screen. Select the entry that is required to be positioned earlier in the convention string and click the up arrow. The reverse procedure applies to positioning an element later in the convention string.
Naming Convention Example
You wish for your planning report to set a naming convention for all activities associated with a specified cross-sectional design string (FXS).
Initially, you want each activity to describe the current project name, then the segment number of the activity. This needs to be followed by the value held by a PHASE attribute in the design string (describing phase 1 to 9). Finally, the string should be finalized with a fixed value representing the production year.
As a more detailed example, assume you wish to define a convention using the following rules, and wish to apply this convention only to the Fixed Cross Section design type, and specifically, the 'Cubby' element:
- Use the first 2 characters of the current project name (which is "UG_Documentation")
- Record the value of the zone attribute ZONE1WF, a single character (there are four zones 1-4)
- Finalize the naming convention with a fixed "Draft" suffix
- Join the 3 convention elements with an underscore.
An example of expected output would be, for example, "UG_1_Draft".
Initially, you would need to create a new naming convention using the controls on the left of the panel. You would also need to ensure that ZONE1WF (a spatial 3D attribute in this example) is available by setting it up using the Attributes panel.
Once that's done, the table below represents the rules required for the new convention:

Note the use of Right and
Left Padding Type to ensure
underscores are only added within the name, not at the start or end.
Managing Convention Elements
Above the table, Naming Conventions tab displays the following buttons:

-
Add - to add an item.
-
Insert - to insert a new item.
-
Move Up - to move an item up the list.
-
Move Down - to move an item down the list.
-
Delete - to delete a convention element.
Convention Properties Table
The Convention Properties table shows the current convention definition for the selection on the right. Some fields are only available to certain convention types, otherwise, they are disabled.
-
Type: select from one of the following:
-
Attribute – Select a previously defined attribute from which to extract a corresponding value. Activates the Attribute field, From Index and To Index fields, plus padding fields (see below).
-
Project Name – Use all or part of the existing project name. Activates the From Index and To Index fields, plus padding fields (see below).
-
Text – Use freeform, static text as part of the name. Activates the Text field only (see below).
-
-
Text – Only available for [Text] elements, enter any freeform text into this field. All characters will be used in the naming convention.
-
Attribute – Select any previously defined numeric or alphanumeric attribute from the drop-down list. Only available for [Attribute] convention elements.
-
From Index – The character position from which to start extracting the naming element. Only available for [Project Name] and [Attribute] convention elements.
-
To Index – The character position (inclusive) to end the naming convention element. If this is longer than the original data, all data will be used.
Examples:
-
For the numeric value "112233", if From Index is '3' and To Index is '2', the element is '223'.
-
For the alphanumeric value "NW_Creek", if From Index is '3' and To Index is '10', the element is '_Creek'
-
-
Padding – Select whether the delimiter character is on the left or right of the naming convention element, or [None] if no padding is to be used. If [Left] or [Right] is selected, enter the character you wish to use to delimit the current element in the Character field.
Note: If Type is set to None, Padding will automatically adjust the name to the attribute field length.
-
Length – A read-only field representing the length of the current element.
Related topics and activities