
Edit Filters
To access this screen:
-
Planning ribbon >> Project >> Settings. Click Naming Convention Assignments >> Edit Filters.
-
Planning ribbon >> Project >> Settings. Click Evaluation Settings >> Edit Filters
-
On the Derived Activities panel, click Edit Filters.
-
Display the Project Settings toolbar and select Edit Filters.
Filters are created by defining a filter name, then assigning a filter expression. They can be used to restrict the scope of several program functions, for example, how they apply automatic attributes during processing. Another example is when filters are used to constrain how dependency rules are applied. Filters allow you to perform operations on a constrained set of data, ensure other data is protected from changes.
The Edit Filters screen is split into two main parts; the right section contains a list of existing filters. Some of these will be system filters (required by UG and not editable) and other user-defined filters may also be present. Filters are particular to a project. The left side of the panel contains the filter parameters for the selected filter.
Filters are formed from one or more conditions, and can also include previously-defined filters in themselves. Multiple conditions are joined by a logical operator that either ensures both conditions or either condition must be met. The Filters panel uses a streamlined form of the Expression Builder tool, but adheres generally to the logic described here.
In essence, data will 'pass' a filter if it meets all criteria defined within a filter expression. For example:
- FXS design data includes a PHASE and Mined_Mass attribute.
- A filter references the PHASE field, requiring it to be anything other than zero.
- The same filter references the Mined_Mass attribute, requiring it be greater than zero.
- Both conditions must be met.
- If they are true for the design data, activities that are spawned from that data will use a naming convention that includes the Project name, Mined_Mass and PHASE values, separated by underscores e.g. "ViperNorth_3_14996"
Each filter condition is comprised of four parts, represented by each column of the table on the right:
- And/Or – Blank for the first condition (which must always pass), this column is used to join multiple filter conditions. Care should be taken to understand the impact of OR vs. AND. It is particularly important to understand how multiple uses of AND and OR within the same filter are subject to operator precedence. You can find out more here.
- Field Name – The attribute within the design data file that will be assessed. You can include multiple attribute references in the same filter expression, e.g. if you wish to assign a particular naming convention if design data carries a specific LEVEL value AND that it has a zero MINED value.
- Test – The equality and relation operator for the expression i.e. how should the Value (see below) be assessed in order to pass the filter? You can choose from standard arithmetic comparators such as =, >=, >, <, and <=. You can also use != to indicate 'value is not'.
- Value – The attribute value that is either met, successfully or compared or not met, depending on the Test (see above).
Automatic Filters
Your application will automatically create a set of default filters at various times.
- For each design definition: you don't have to use these filters,
but they may save time (for example, when setting up design definitions
- the filters list will contain a filter for each definition that
currently exists in the project. Such filters are recognizable
by their naming convention; (DESIGN TYPE) (DESIGN DEFINITION NAME), for example (FXS CUB Cubby).
- When design definitions are modified, the Design Definition Filters are also updated.
- When a design definition is renamed, the name of the associated filter is renamed.
- When a design definition is added, a new system filter is created.
- When a design definition is deleted, the associated filter is also deleted.
- For each Group Position: a filter will be created for each of the available spatial dependencies group positions (start, end, middle, any).
You don't have to use these filters, but once a filter is used, its associated design definition will become locked and cannot be deleted.
Managing Filters
Filters are configured by setting up a definition on the left of the panel, then assembling elements of the corresponding filter condition on the right.
The left side of the Edit Filters panel can be used for the following functions:
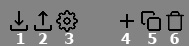
- Import an XML file containing filter definitions.
- Export the currently-defined filters as a portable XML file. This can be transferred to other UG systems, for example.
- Generate filter expressions based on an attribute, using the Generate Filters dialog.
- Add a new filter to the collection.
- Copy the currently selected filter to a new item.
- Delete the currently selected filter.
Naming Convention Filters
You should define the context in which a naming convention
is applied. This is done using a predefined filter.
Data that passes the nominated filter will be subject to the corresponding
naming convention.
Next, you need to define the convention that is associated with that
filter (Edit
Naming Conventions).
For example, you wish to prefix activities associated with fixed cross-sectional
data with 'FXS_'. You can also define an automatically incremented
index that will accompany this 'design type' convention attribute
(Edit
Attributes), and choose if you wish to pad an element of
your naming convention with a special character (e.g. to use an underscore
to separate all elements of your naming convention other than the
last one).
You can access the Attributes panel using the bottom in the bottom left of the Edit Filters panel:
Using Multiple Filter Conditions
Where multiple conditions have to be met to pass a filter, things can get complicated. For example, the expression:
A = 1 or B = 2 and C = 3
Could be regarded as ambiguous; it could mean that a condition passes if A = 1 or B = 2 but C always = 3, or it could mean that it passes if A is 1 and either B = 2 or C = 3. Datamine uses the accepted operator precedence of:
- NOT (!=) first
- AND next
- OR last
As such, the filter expression above will be processed as "both B and C must equal 2 and 3 respectively, or A must equal 1".
You can change this behaviour by wrapping conditions in brackets. Expressions are first solved within their brackets, which makes it easier to set things up. For example:
(A = 1 or B = 2) and C = 3
Changes the filter so that values will pass if C = 3. They will also pass if C is not 3, but either A is 1 or B is 2.
The Edit Filters screen supports the usage of brackets to control the filter expression. Opening brackets are inserted as part of the Field Name description and closing brackets are added to the end of the Value. For example, the following setup will ensure a filter passes if the PHASE is 1 and either the Mined_Mass is non-zero or the DESIGNDF (design definition name) is "Cubby"):

Filters in Filters
Sometimes, you may want to use the results of filter as part of another filter expression.
You can either set up a filter expression element that represents the data values that PASS a filter, or you can specify that the expression element excludes them. This is done using hte special Field Name entries:
-
<Items IN Filter>
-
<Items NOT IN Filter>
For example, "FILTER1" is set up to isolate data that passes the following DESIGNDF conditions, because you don't want a filter to include design definitions with these particular labels:
DESIGNDF=DECLINE
DESIGNDF=SHAFT_1
DESIGNDF=SHAFT_2
Following this, if you create a new filter (FILTER2) for all other FXS design elements but you could specify your previous filter as a proxy Field Name on the Edit Filters screen. Essentially setting up a filter that means "The filter includes all fixed cross section design elements apart from those that pass FILTER1".
In this case, you could use the following filter definition for FILTER2 (after setting up FILTER1):
| And/Or | Field Name | Test | Value |
| DESIGNDF | = | *FXS | |
| AND | <Items IN Filter> | != | FILTER1 |
(The second row could also use the <Items NOT IN Filter> Field Name and a Test of "=")
Using this method, you can reference one or more filters in any other filter, allowing the same filter expression results to be reused.
Managing Filter Expression Elements
The top left corner of the Edit Filters panel contains the following buttons:
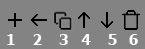
-
Add - to add a filter condition.
-
Insert - to insert a new filter condition above the selected item.
-
Copy - create a copy of the selected filter. This can be useful to create variations of similar filters.
-
Move Up - to move an item up the list.
-
Move Down - to move an item down the list.
-
Delete - to delete a filter condition - be careful if doing this with bracketed conditions (you may need to reintroduce a brack to the next/previous condition to ensure the integrity of the expression isn't compromised - it's an easy mistake to make!).
Note: This screen includes table grids that support multiple row selection.
Related topics and activities