|
|
Studio UG Tutorial - Interrogation Setting up block model evaluation and depletion rules |
Underground Planning Tutorial - Model Interrogation
Studio UG adopts a rule-based approach to evaluation and depletion of block model data (summarily referred to as "interrogation").
While the system supports multiple block models, the action performed on a block model (e.g. depletion) results in this block model being altered and acting as the input for the next instance of the use of that model. If you haven't read it already, you should review this help topic to give you some background information to how and why Studio UG lets you determine your model interrogation rules as part of the initial project setup. It may also help for you to review this information on block model depletion before you proceed with the following exercises.
The following exercises define the model for your project (Studio UG supports multiple models, but only one is specified here for simplicity). Next you will set up an evaluate-deplete-reevaluate rule set to control how data is evaluated during sequence processing.
Prerequisites
-
You have set up your naming conventions and filters, as described in the previous section.
Exercises in this section
This section contains the following exercises:
- Define Block Model
- Define Evaluation Properties
- Define Default Values
- Define Interrogation Rules
- Define Evaluation Legend
Exercise 1: Define Block Model
In this exercise you will define an input model for underground planning. Studio UG lets you define as many models as you need for your project but this examples references only a single data file.
- With the Project
Settings panel displayed, select Edit
Block Models in the Interrogation
Settings group:
- Your project doesn't reference a block model yet, so you need to add one. Click "+" to add a row to the table below (multiple models can be specified, although you will only be defining one for this project).
- In the File Name field, select the browse button to display the Project Browser dialog.
- In the Project
Browser dialog, select the browse button next to the Filename field:
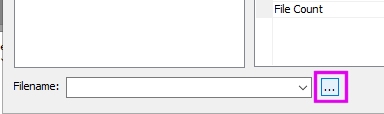
- Select the file "BM_Benching.dm" from your project directory and click Open.
- Click OK again to return to the Block Model Files panel.
- The rest of the table fields are filled out
automatically. As the input model contains a DENSITY field, it
is automatically set but this can be adjusted to another field
if one exists (in this case, the default is what you want).
The Status field indicates the model exists in the location originally specified. If it is moved, renamed or deleted later on, you'll see a warning here (as well as several others throughout UG as depletion and evaluation will be blocked). - Click OK to return to the Project Settings panel.
Exercise 2: Define Evaluation Properties
Studio UG comes with a host of default evaluation properties that can be used to interrogate your model (mined volume, length, depleted volume and so on). You can also define your own properties.
In your project, you're interested in AU grade. You're also going to set up a derived activity for backfilling, so a property describing the backfill volume is needed.
The Properties panel is used to define the properties you wish to report in evaluation and includes the unit of measurement associated with each property as well as whether the property is used during evaluation or if it is weighted against another property (e.g. weighting a volume against a density).
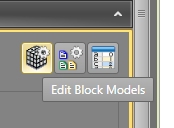
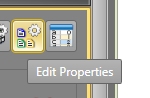
- In the Setup
panel (Interrrogation Rules
group), select Edit Properties:
- You'll see several system properties in grey
- these aren't editable.
Click "+" to add a "NewProperty" item - double-click to edit this description to read "AU". This will be your grade evaluation property. - As a grade property, add "g/t" to the Units cell.
- As you want to evaluate this property during model interrogation, enable the Is Evaluated check box.
- Add another property; this time call it "Backfill_Volume"
and set the units to "bfm³" (copy and paste the description
here to quickly add the superscript). The property is automatically
weighted on 'Mined_Mass' (as are all attributes where the Is Evaluated setting is enabled).
You should be looking at this information: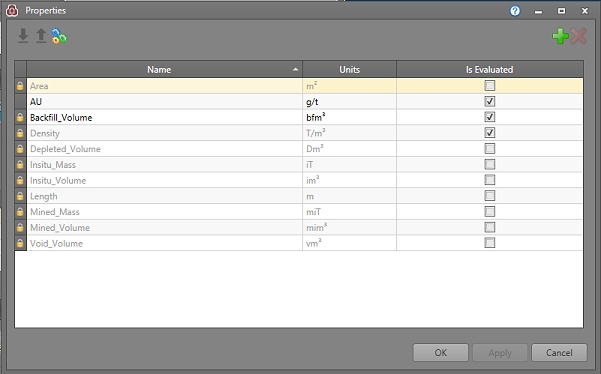
")
Any property set as Is Evaluated will be weighted on its Mined_Mass value. - Click OK to return to the Project Settings panel.
Exercise 3: Define Default Values
Studio UG uses the concept of "Default Values" throughout the planning process. In this exercise, you're going to set up a default value for the system "Density" property.
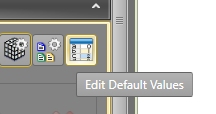
- In the Setup panel
(Interrrogation Rules
group), select Edit Default Values:
- The Edit Default Values
panel contains a list of all default values for every property
to be evaluated (i.e. its Is
Evaluated setting in the Edit
Properties panel is selected).
The default value for [AU] (0) is fine, but the [Density] Default value is currently set to 1 and needs to be higher. Set it to "2.8" for this tutorial. A density of 2.8 will now be assumed for evaluation purposes if absent density data is detected in the model. - Click OK to update the default value for the Density property.
Exercise 4: Define Interrogation Rules
At this point, you can define the steps to take during model interrogation (Evaluate or Deplete). The order in which the steps are specified is important as Studio UG will perform them in a top-bottom order as dictated by the Interrogation Rules table.
In this exercise, you will define 3 interrogation steps which will be completed in order:
-
Interrogate all ore development wireframes against the undepleted model (bm_Benching). This uses an imported filter that segregates data using the expression DTYPE = ORE.
-
Deplete [bm_Benching] against the ore development wireframes. This uses the same filter as above. In this instance, you will set up custom sub-celling when depleting the model.
-
Interrogate all project wireframes against the resultant block model from step (2). This uses the system *WFM filter, which all project wireframe data will pass.
To do the above, you need to edit the contents of the Interrogation Rules table. You've already defined/imported the filters required, so it won't take long:
- Click "+" to add an interrogation rule to the table.
- The default setting is to [Evaluate], which is correct for the first phase of interrogation for your project.
- As there is only one model associated with the planning project, it is automatically added to the Block Model field.
- You will be evaluating ore development wireframes, as defined by the imported "OreDev" filter. Select [OreDev] from the Filter drop-down list.
- As an evaluation step, sub-celling settings are irrelevant and not editable.
- Add ("+") another step, this time using the [Deplete] option. Use the same [OreDev] filter.
- In this case, you're going to sub-cell the model during depletion to determine a higher-resolution evaluation boundary. Click inside the Parent Cell Divisors cell and select the browse button.
- The Edit Parent Cell Divisors
tool lets you define the sub-cell size for depletion in the 3
major axes. Select 10 for all 3 divisor fields:
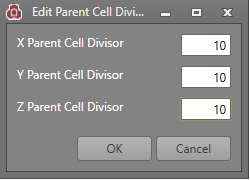
- Click OK to return to the Settings panel.
- Add a final interrogation rule to the table, this time to [Evaluate]
the model using the [*WFM] system filter. This will trigger an
evaluation of all wireframe data in the project against the model.
Your Interrogation Rules table should now look like this: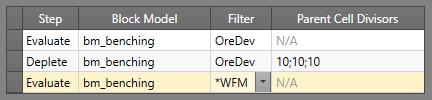
Exercise 5: Define Evaluation Legend
the final part of your planning setup is to define an evaluation legend against which model evaluations will be performed.
This is currently held in an external file so needs to be added to your project.
- Activate the Format ribbon and select Overlays | Format Legends.
- Select the final entry in the table (Studio UG only permits
selection from the Project Legends group) then click Load
Legend:

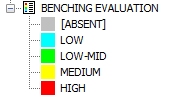
- Select the file "BENCHING EVALUATION.elg" in your
project folder. This is a simple evaluation legend breaking down
model AU values into 4 bins of equal range size:
- Close the Legends Manager and return to the Settings panel.
- Select the Evaluation Legend check box.
- Using the Legend drop-down list, select [BENCHING EVALUATION].
- Using the Legend Field
drop-down list, select [AU].
Your Evaluation Legend section should now look like this: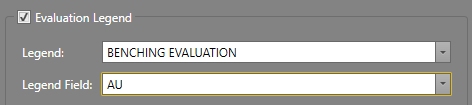
- Save your planning settings using the Save
button at the top of the panel:
Project setup is complete! In the next exercise you will assign some previously-defined attributes to your design data.
