
Project Data Control Bar - Survey Database
To access this screen:
- The Survey Database folder is a sub-folder of your Project Data control bar. It can be expanded to reveal further categories of data.
Studio Survey relies on a database structure to understand the data that is stored within it.
You can set up a new database, or link to an existing one using the Database Settings screen.
Each new database will include a default hierarchical structure that denotes:
- For open pit survey data storage: the pit, area, ROM folders and corresponding data. For open pit scenarios, the database is used to store both the inputs to survey reporting (data is added using the Add to Database task) and the outputs from each reporting function.
- For underground survey data storage: the decline, area, level, stope folders and corresponding data. For underground scenarios, the folder structure represents file storage only.
The folder structure is used to specify the type of data that is being input or output, and the date to which the survey data relates.
The folder immediately below the Survey
Database item will describe the current path to the configured
database, e.g.: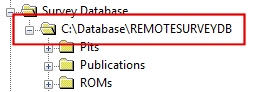
If no database has been configured
for the current project, this folder will read [No
Database Specified].
Data is arranged within the Survey Database folder using a hierarchical structure, which is replicated in the folder structure that is used for storage. This structure is described in more detail here.
For example, each pit in the database is represented by a corresponding folder in the local database's "Pits" sub-folder. Within each pit folder, an "Areas" sub-folder contains other folders representing major areas of pit operations (or, in fact, any survey data that needs to be distinguished from other data at a secondary level). Within each area folder, a set of folders exists that represents each of the fundamental data types associated with survey reporting, e.g. "Pit Excavation Boundaries".
Within each data type folder, folders are created by the reporting functions and are named using a standard date format.
Note: You should not edit the contents of the survey database folder on disk as this could cause existing data connections to be lost.
Each file in the database is supported by a context menu.
Project Folder Menu
At the highest level of the 'tree', a project icon displays. Right-clicking it reveals the following:
| Open Containing Folder | Open a Windows folder containing the open project. |
Data Type Folder Menu
Right-clicking a data type folder (such as Geostats Parameters, for example) reveals the following menu options:
| Add>> | |
| >> New File | Create a new, empty data table or macro using the Add New File screen. |
| >> Existing Files | Add a file from disk to your project. The file can be of any type. |
| >> Import Files | Use the Data Import screen to import a data file to your project and set up automated data conversion using the Data Source Drivers. |
| Paste | If data has been previously copied to the clipboard, paste it into the target folder. |
| Open Containing Folder | Open a Windows folder containing the open project. |
| Expand | Expand the target (and any other selected) folder to show its full contents. |
| Collapse | Collapse the target (and any other selected) folder. |
Tip: Collapse and expand multiple folders by right-clicking more than one and picking Expand or Collapse. The folders can be in any position of the Project Data bar.
Item Context Menu Options
Note: Not all commands in this section may be available. For instance, Re-import is only available if the data was originally imported using Data Source Drivers.
Right-click a file in the Project Files control bar to choose from one of the following options:
| Open | Open the selected file in the Datamine Table Editor for viewing and editing the file's contents. |
| Load | Load the selected file(s) into memory. If data contains visible elements, the primary 3D window updates to show that data with the default overlay for the data type. |
| Preview |
View the selected file in the InTouch Go utility. Use this utility to preview 2D or 3D data before or after it is loaded into memory Note: InTouch Go is a standalone application and does not require a license. |
| Display |
Typically used for Plot file types, display the selected file in the legacy Graphics window. Note: This command launches the DISPLA process. |
| Re-Import |
If the selected file was imported using Data Source Drivers, re-import it using the associated driver and import settings. Use this option when the source file has been edited and the changes need to be shown in the resulting imported Datamine file. If the selected file was not imported using Data Source Drivers, this option is unavailable. |
| Export | Export the selected data using Datamine's Data Source Drivers facility. |
| Remove from Project | Display general folder summary information in the Properties control bar. This includes number of files contained. |
| Cut | Cut the selected file(s) to the clipboard and remove it from the project. |
| Copy | Copy the selected file(s) to the clipboard. |
| Delete |
Delete the selected file from disk. Warning: This action will REMOVE THE SELECTED FILE FROM DISK PERMANENTLY. Care should be taken when using this command as it cannot be undone. A confirmation dialog will be displayed before this action is performed. |
| Rename | Rename the selected file, on disk and in the control bar. |
| Open Containing Folder | Open a file browser showing the selected file. |
| Properties | Display summary file information via the Properties control bar. |
3D Folders
The context menus for the 3D folder are the same as those found for the Sheets control bar's 3D Data Folders.
Tip: Select one or more overlays to perform batch operations, such as unloading or deleting, or setting the visibility of a group of overlays at once. Your selection can span multiple folders.
Plots Folders
For more information on Plots folders, see The Plots Window.
Related topics and activities