|
|
Adding and Editing Machine Types |
Machine Classes
![]()
To access this dialog:
-
Select any machine class in the Scheduling Setup dialog and enable the Machine Class Settings tab.
The Machine Class Settings panel is used to define machine class parameters and symbol display options.
The information on this panel will relate to the currently selected machine class on the left.
This includes a machine's rated capacity and, if one has been defined, an associated maintenance calendar.
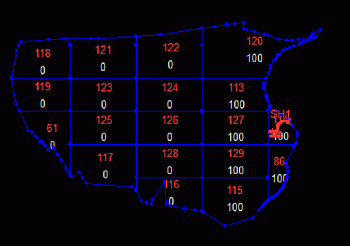
Displaying Machine Locations
The location of any machine can be displayed at any time within the schedule. By defining theDisplayparameters in theMachine Classdialog, the Machine Class symbol will be displayed for the selected block outline once the relevant activity (e.g. loading) for the machine has been scheduled. This icon will be placed at the block's centre of gravity. The date/time window in which the machine(s) is displayed for a selected period is controlled by the settings defined in the Machine Display dialog.

Maintenance Calendars
A Maintenance Calendar can be associated with the Machine Class in order to define planned maintenance events.
Availabilities, Efficiencies and Utilization Calculations
The Mechanical Availability , Use of Availability and Operational Efficiency (all in units of percent) can be entered for individual periods or ranges of periods. For instance if the first End Period is entered as 10 then the values will be applied to Time Periods 1 to 10. A different set of values could then be entered with a second End Period of 99 and these will be applied to Time Periods 11 to 99.
The Utilization (%) is then calculated as follows: Utilization = Mechanical Availability x Use of Availability x Operational Efficiency.
Studio OP uses the Utilisation to calculate the operating hours as follows: Operating Hours = Utilisation x Calendar Hours.
Adjustment Factors
An adjustment factor can be applied to the Rated capacity by selecting the relevant field from the drop down menu for Adjustment Factor. For instance this field might relate to the Blasting Index (BI) of the rock and the BI can be used to modify the digging rate as follows:
Adjustment Factor = (BI for Block/BI at Rated Capacity)
Actual Machine Capacity =
Rated Capacity x Adjustment Factor

Field Details:
General Settings
Name: enter a unique name for the new machine class.
Abbreviation: accept the default or define a new abbreviation (short description) for the machine class.
Capacity Settings
Rated Capacity: enter a value for the rated capacity (tonnes/operating hour, volume/operating hour) of a single machine of the machine class specified in Machine Class Name.
Units/Op Hr: select
the numerator unit field (per operating hour) for the machine rate.
This field comesfrom
the defined Reserves table.
For Loading it might be [TONNES] or [VOLUME]; for Drilling it might
be [DRILL_METERS]; for an Explosives Truck it might be [BLAST_METERS].
From a field treatment perspective this field would be 'accumulated';
for more information on how accumulated field values are defined and
used, please click here.
Adjustment Factor: optionally select a table column that contains adjustment factor values.
Maintenance Calendar: select a maintenance calendar from the dropdown.
Categories Settings (loaders only)
Loaders can be restricted to only mine certain categories. For example, for some types of operations, different loaders are used for mining waste than the loaders used for mining ore. For each defined category, as depicted by the reserves file associated with your scheduling scenario (which would normally be inherited from the evaluation legend used to generate the reserves table).
Select the category or categories that your machine can mine. Only designated category material will be mined by the current machine class.
Display Settings
These settings control the display of Machine Class symbols and paths, which are displayed when blocks are scheduled.
Symbol: select a machine symbol from the dropdown.
Symbol Library: select a symbol library from the dropdown.
Symbol Size: select a symbol size (mm); a good default is '10'.
Path Style: select a path line style from the dropdown.
Line Width: select a line width (pts).
Color: select a color from the color palette.
Calendar Settings
End Period: for each record, using the dropdown, select a value for the end scheduling period for which, or up until which, the associated availability, efficiency and utilization parameters apply.
Units: enter a
value defining the number of units for the selected machine class
required for the specified period; default '1'.
This will change the capacity hours for the Machine
Class. This methodology mainly applies to medium term planning e.g.
where the machine fleet size varies over time as new units are purchased
or decommissioned.This can also be achieved
by modifying the utilisation period by period but is not a recommended
approach.
This methodology may also have usage for short term
where the user wants to model the number of haul truck units day by
day. However it is probably better in this case to keep the number
of units fixed and vary mechanical availability day by day according
to the Planned Maintenance schedule.
Using a Maintenance
calendar to control the number of available haul trucks is also
not recommended as it means that the whole fleet is down during a
PM, where you actually want to model a partial fleet.
Mech Avail %: for each record, enter a value (%) for the Mechanical Availability of the truck class.
Use of Avail %: for each record, enter a value (%) for the Use of Availability of the truck class.
OpEff %: for each record, enter a value (%) for the Operational Efficiency.
Utilization %: the automatically calculated Utilization (%) for each record.
Cost/TONNES: if you wish to associate a processing cost with a period/machine class combination, enter it here.
|
| Related Topics |
| The Scheduling Data Setup DialogAbout Machines |


