
Haul Truck Classes
To access this screen:
-
On the Schedule ribbon, select Setup >> Haul Trucks.
-
On the Schedule ribbon, select Data Settings, then select any haul truck item on the left.
-
On the Update Schedule screen, enable the Haul Trucks option, then click the browse button.
The Haul Trucks screens are used to add, edit, and delete haul truck classes and their associated parameters, including performance settings.
Haulage trucks have a capacity per truck, and you can enable utilisation so trucks can be used with selected loaders. Performance controls truck speeds on different gradients. You can define performance as either a linear speed, or by using rimpull and retardation.
Trucks and machinery are displayed in the machines control bar. You can show them per unit or per fleet (when you have multiple units of the same type).
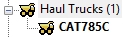
Previously defined machine classes appear in the menu on the left and are either a Loader type or a General type.
Select a haul truck to show its properties on the right.
You also use this screen to access the following settings:
-
General Haul Truck settings – Define Machine class parameters and symbol display options. See Destination General Settings.
-
Performance settings (loaders only) – Set up auto scheduler rules that will apply only to the selected loader class. See Destination Throughput/Recovery.
Activity steps:
-
Display the Haul Truck Classes screen.
-
To add a new haul truck class, right-click the Haul Trucks top-level icon in the menu on the left, then select Add.
-
Select the new haul truck class, then edit its properties, including its default name, for example:
Note: To delete a machine class or machine type, right-click the required item in the menu on the left, then click Delete.
Related topics and activities